Mastering Composition to Get More Keepers in Street Photography
#399
Mastering composition is the best way to get more keepers in your street photography. That makes sense right? If you know how to make a visually pleasing image, then you can discipline yourself to capture the remarkable photos that tell a story. Heck, you might even be able to ease up on that trigger finger. Stop wasting bullets when you “work the scene,” trying to get a lucky shot, and nail it the first time like a sniper. You didn’t see Babe Ruth swinging like a mad man at every pitch. He waited for the perfect pitch to hit a homerun. That’s why I created this article and P.O.V. video… to help bring attention to the importance of composition above all else.
Join the discussion on PetaPixel.
Video recorded with Pivothead sunglasses, Zoom H1, and lav mic.
Mastering Composition to Get More Keepers in Street Photography
I’m not a self-proclaimed master of anything. I’m just a guy that finds a huge amount of pleasure in people watching, and challenging myself by using old cameras, film, and masterful composition. Street photography is so exciting! No better way to hone your craft then to have endless subjects at your disposal. Application won’t be enough though. You’ll have to study composition. You’ll have to study the masters; the photographers who have proven themselves throughout time. Guys like Henri Cartier-Bresson, Alex Webb, Martin Parr, Joel Meyerowitz, Garry Winogrand, Jeff Mermelstein, William Eggleston…the list goes on and on…all inspiring, and all capturing the truth of life.
Now, everyone is going to have their own personal approach to documenting life on the streets. You just have to compare the work of Bruce Gilden and William Eggleston to see the difference. Gilden will get up in the subjects face and be intrusive, and Eggleston drags his feet to a colorful scene and takes only one photo before he moves onto the next scene.
It’s a stated fact that most experienced photographers only get one keeper per roll. It’s also stated that most Magnum photographers hate seeing their contact sheets. Bruce Gilden even said that he only gets one keeper per 50 rolls. Ouch! This ratio is absolutely horrible. He’s got some hilarious pictures, but if this were baseball and he only hit one homerun out of 1,800 attempts (36 per roll), then he would be warming the bench indefinitely. I don’t follow sports at all, but the analogies make sense. Besides, street photography is kind of a sport, right? Sports hunting…on the prowl for the perfect shot…eager to share a “trophy kill” with the world. Yet, to get a trophy kill, we need to know and apply composition. It takes work though. Great composition isn’t a drag and drop process.
Contact Sheet
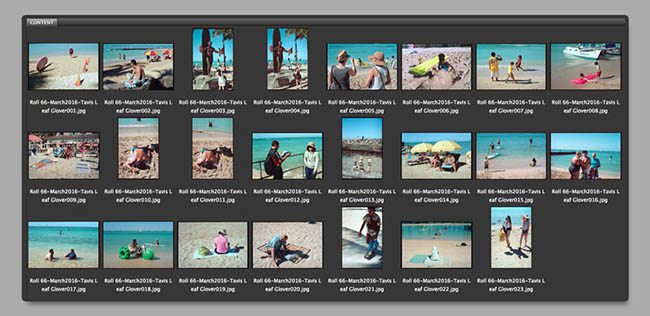
Below you’ll find a section of the contact sheet (23/36) which was captured in the P.O.V. video. Not all of them are keepers that’s for sure (maybe none of them are in your opinion), but knowing composition helped increase the ratio. In the majority of them I attempted to apply sophisticated composition techniques which superseded the impulse of excitement. Sure, I used the impulse of exciting color (mostly red, yellow, blue, green) and humor to attract me to a scene, but if the composition wasn’t working, then I saved my ammo.
Equipment Used: Leica R4 SLR, Summicron 50mm f/2, Kodak Portra 160
Typical Settings: 1/1000, f/9.5, 7ft focal distance. As I walk around, I’m constantly checking these settings, and adjusting as needed.
Location: Waikiki Beach, Honolulu, HI
Time: 9am
Thought Process in the Approach
Let’s take a closer look at the images. I’m big on presenting street photography as I see it, so I don’t crop or manipulate. The black border you see is the edge of the film, which was captured when I scanned it. Also, the post processing is very minimal…mostly color correction, dodge and burn if needed, and contrast adjustments…no cloning out, no color swapping, etc.
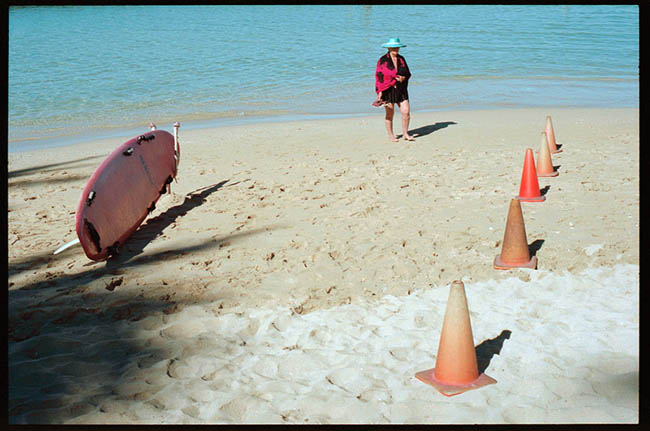
In this first one, I saw the scene from the sidewalk. I was attracted to the color of the woman’s hat and towel. As I approached the scene I thought in my head to try and incorporate the surfboard and cones.
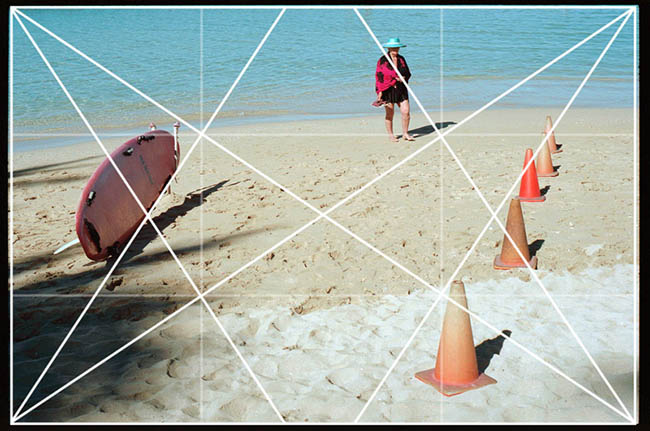
Whenever I shoot, I’m always trying to use dynamic symmetry as a way to organize my composition and include diagonals. I didn’t have a grid on my camera, but the 100’s of paintings I analyzed in the past were engraining the basic armature into my mind, which is definitely a good thing. This basic grid is just as easy to use as the rule of thirds, but is a better foundation to build your skills upon (see 10 Myths About the Rule of Thirds).
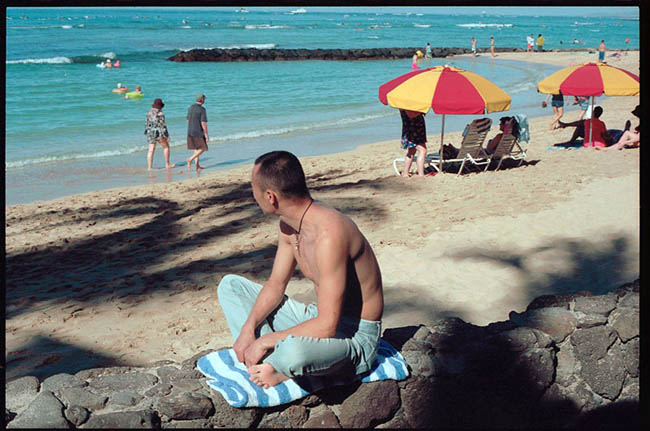
In this next one I’m still hunting for color and interesting scenes. The city is still waking up (like me). Tourists walk around like zombies sipping their mocha latte’s, so the keepers are still in the making. With this shot I see the color in the background, and the blue towel in the foreground. I adjust my position to get a good figure-ground relationship, where the man in the foreground fits nicely into the background.
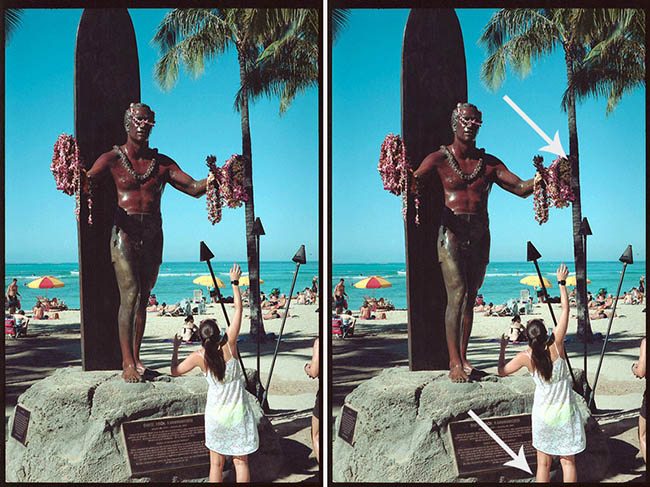
If there’s one technique you should learn that will help your photography it’s Figure-ground relationship (FGR), which is a Gestalt psychology technique. In the next example you can see how I didn’t double check my FGR and the statues arm is colliding with the tree in the background. I also cut off the girls legs.
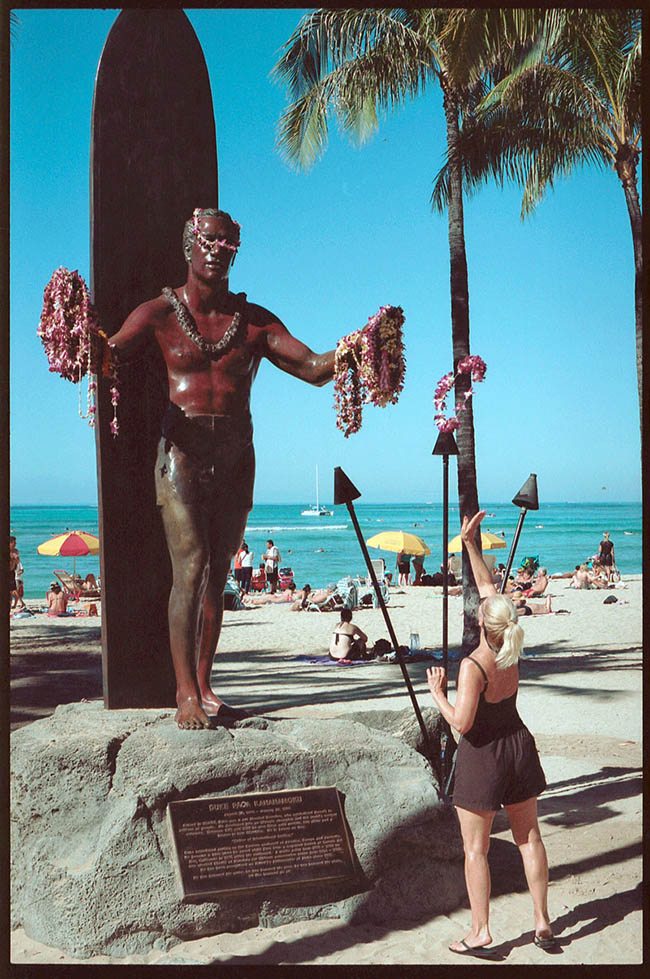
Usually I remain disciplined and take only one shot per scene, but in this case I noticed that I could make a slight adjustment in my position to improve it. So, I moved to the right a bit, then waited for the blonde lady to throw her lei. Her feet weren’t cut of and the FGR was improved as you can see below. I still wish the lei and the lady were free of background distractions…can’t win them all.
Now, imagine I was shooting digital and had an LCD on my camera. I probably would’ve been checking it (chimping) after the first shot, and missed the second. Stay in the moment, chimping is a crutch.
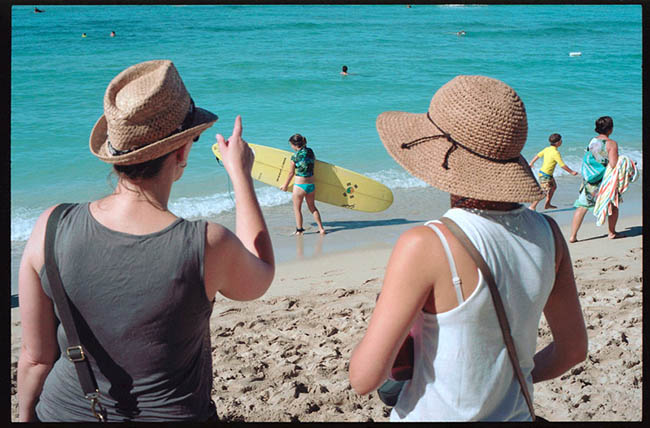
As I was approaching the beach I was still looking for color. I noticed the surfer girl in the distance and the girls with the hats were emerging from the shadows. I got behind them and waited for the two people on the right to be clear. Just as I snapped it, the girl raised her hand. “Damn,” I thought. I wasn’t anticipating it, but I love capturing gestures when I can. It adds a bit of life to the image.
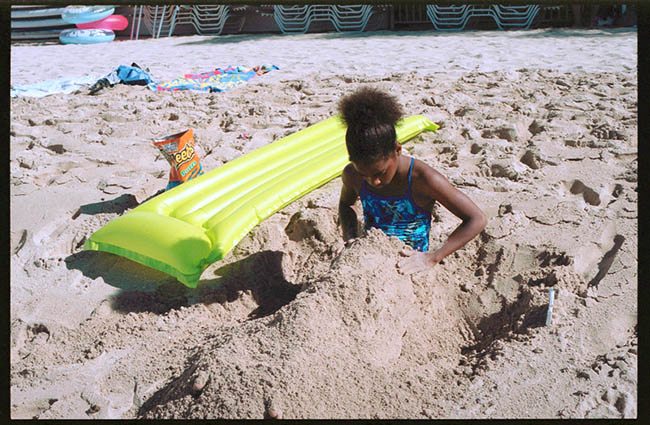
As I walk down the beach I’m always scanning. My eyes bounce from group to group, trying to piece together a scene with color and humor. I noticed this girl burying herself in the distance and she had a raft creating a diagonal, and a bag of Cheetos to munch on. As I passed by, I tried to get the bright raft behind her hair to create a nice FGR. This helped accentuate her hair.
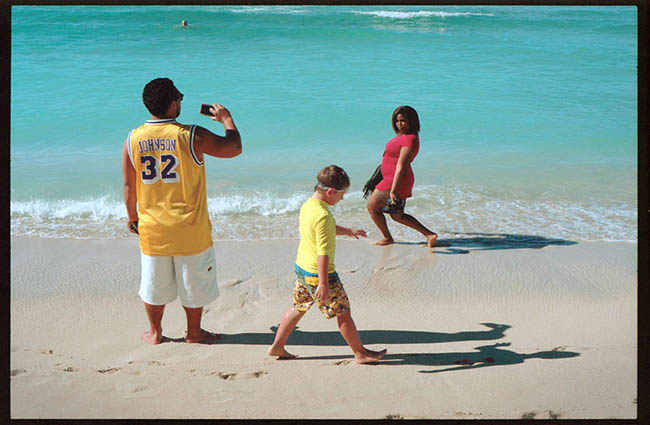
The guy in the yellow sports shirt, and his girlfriend were giving me some nice colors, and to make it more complex, I waited for the walking boy to get in the middle. All of them have great FGR, and can be easily identified.
This brings me to another technique worth mentioning. It’s called Aspective view, which means that the shape each person is creating can be easily identified. If they were standing with their arms and legs together, or curled up in a ball, the mind would have to work harder to try and identify them. Think of old Egyptian paintings which were created with the limbs separated. Yes, we can learn a lot from artists of the past!
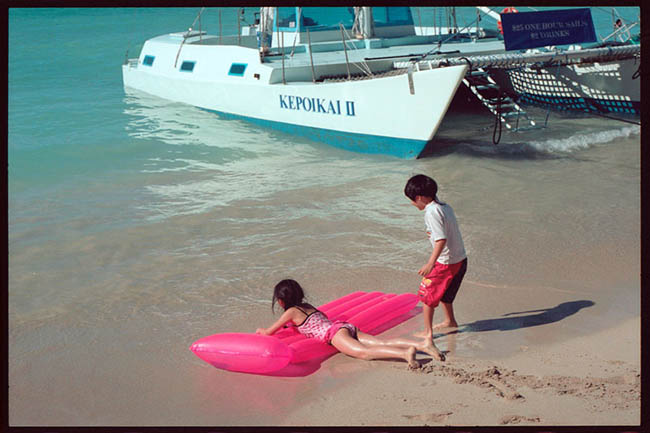
In this next photo, I see the pink raft and the blue boat in the distance. I wait for the girl and boy to be separated enough for a good figure-ground relationship, then I take the shot. The girl is paralleling the diagonal of the boat, which wasn’t consciously noticed at the time, but helps the composition. Paralleling diagonals create repetition within an image.
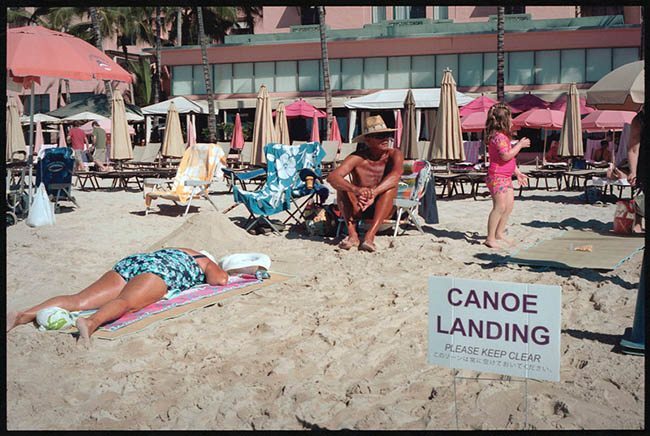
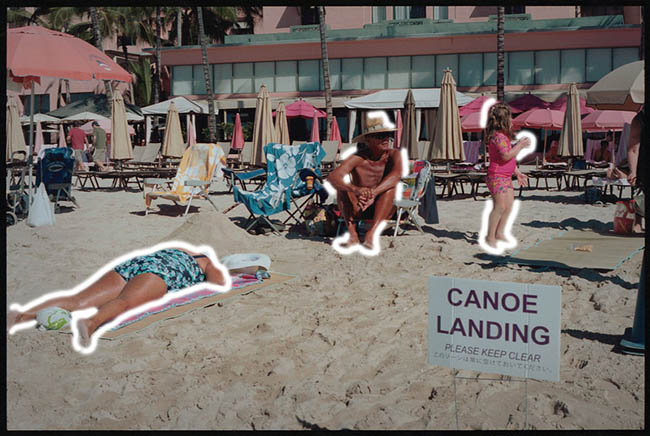
The colors and the old tan guy were things that attracted me to this scene. Plus the opportunity to create a juxtaposition with the “Canoe Landing” sign and the face-planting old lady.
If we run an imaginary line around the subjects we can see that the figure-ground relationship is a bit weak in the old man and the little girl. Not much could’ve been done in this situation to improve the FGR, but we do have nice separation with the old lady and the sign (aside from the fact that I chopped into her foot).
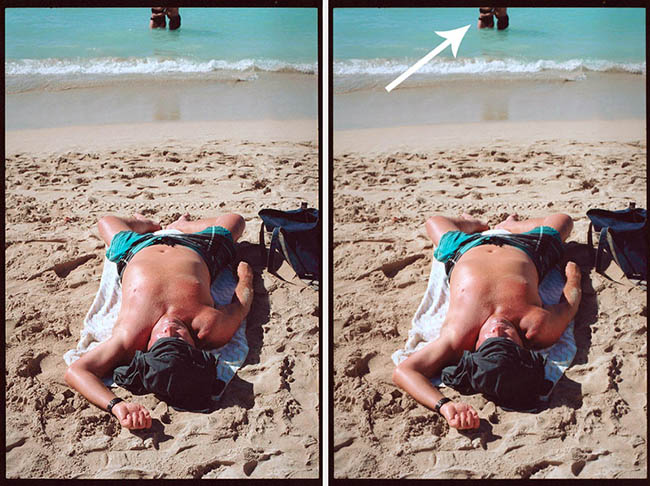
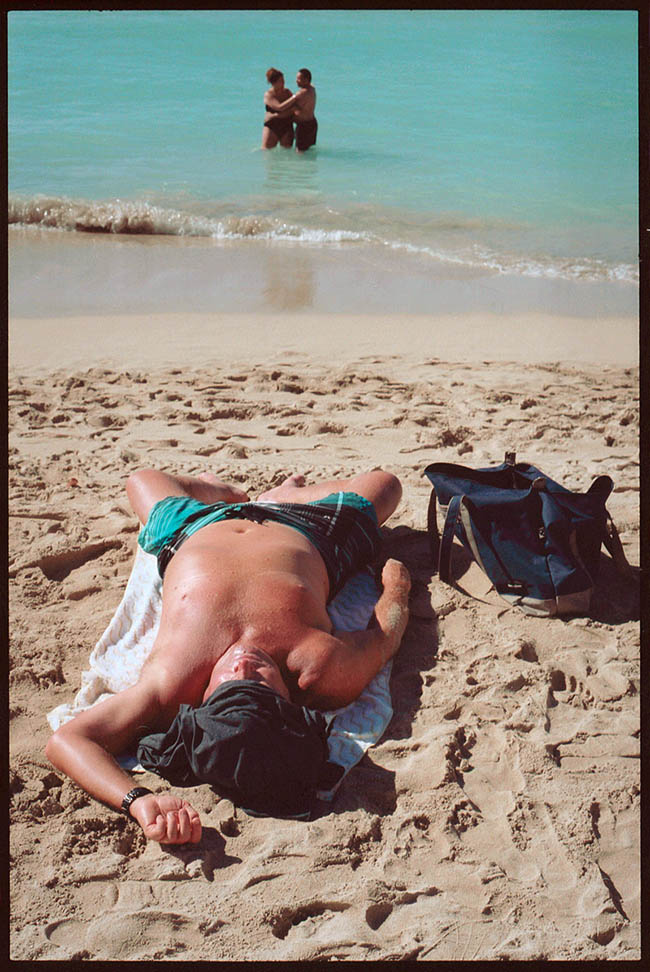
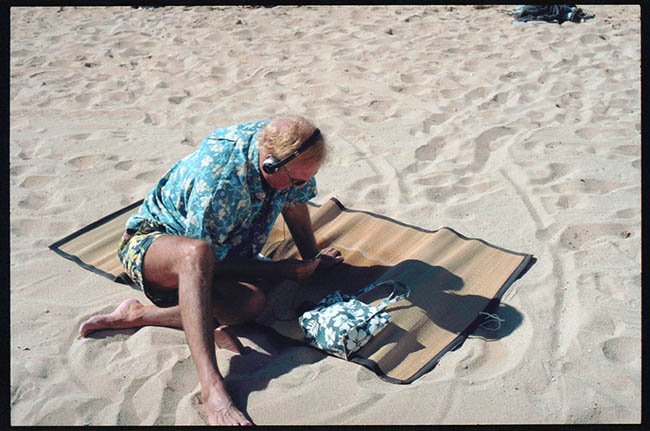
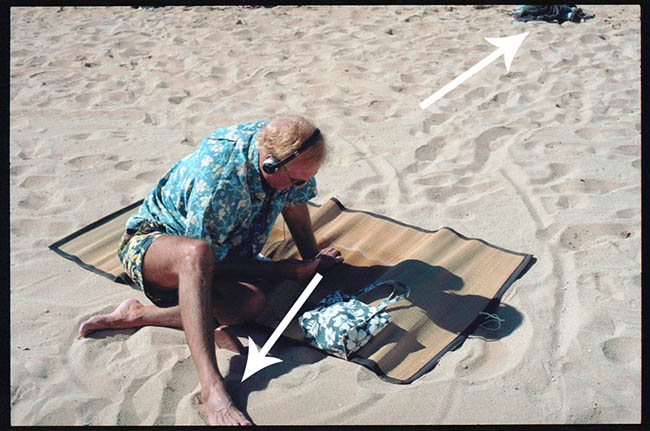
I don’t know about you, but when I go to the beach I don’t sleep with my legs spread wide. That’s why this scene was funny to me. After taking the first shot, my eye caught the kissing couple at the top of the frame. This killed the shot for me. I call this Edge Flicker, where there are contrasting elements near the edge of the frame. I needed to take another shot, and fast.
This time, I was able to capture the couple and have them coincide with the man (we’ll learn more about coincidences soon). Now, the story of the image is improved and to me it’s surreal…like he’s dreaming of being with a girl.
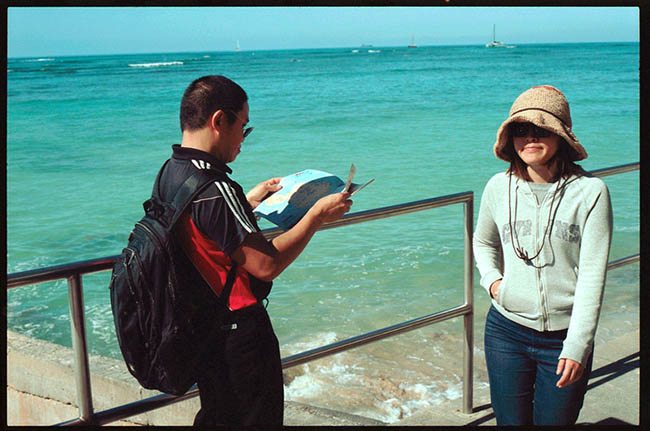
This man was checking out a map, so I had to get a shot for my “Lost in Paradise” series that I’m working on. It’s funny to me that Waikiki is a little strip of beach, yet tourists are always lost.
I waited for the girl with the funny hat to get in the scene, then took the shot. The color palette could be improved with yellow and green, but the FGR is good.
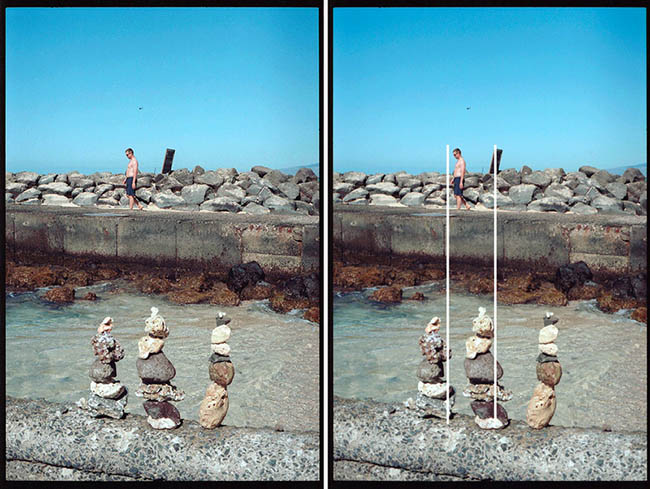
The rocks on the wall were grabbing my attention, and since there was minimal color, I wanted to try and incorporate a Coincidence. This is where elements of the image line up on the same linear path to create unity and movement.
I almost gave up on this one, but the man came out around the corner and I waited for him to get into position. The black object was lined up, but I could’ve waited for the man to create an aspective view. Also, if there were one more person on the right the composition would be complete.
As you watch the video, you’ll see how this next scene excited me. This is just a funny “old lady” scene with great colors and interesting characters. One lady is even wearing her socks!
I pull a “stalker move” and pretend to take a photo of the water bike on the right, while I’m looking left out the side of my sunglasses. My camera settings and focal distance is set, so when the moment is right, I turn to the left and capture it.
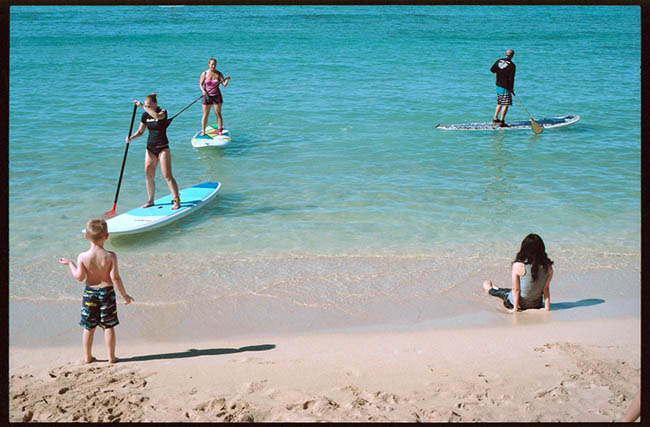
Here I noticed the SUP boarders coming closer to the beach. I love complex scenes like this where I can try to separate the shapes and still keep them unified. I wanted to create a triangle, but here we can see good FGR, aspective view, and coincidences. Plus, to me, it has a surreal feeling…like the boy is holding the boarders up in the air with his teeth.
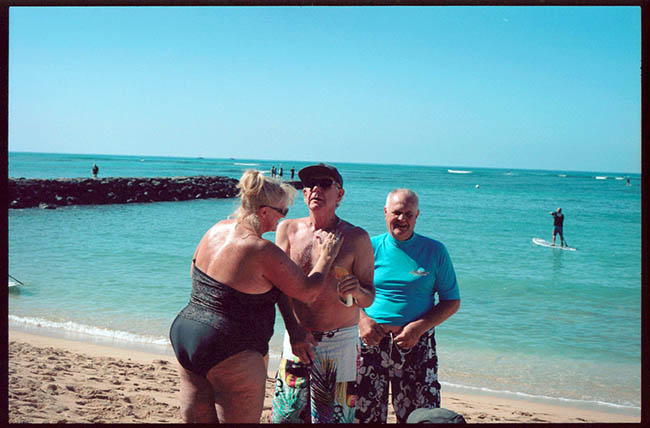
This next one was taken in haste to try and capture the woman rubbing sunblock on the guy (another series), but I didn’t get quite high enough.
The figure-ground relationship is weakened. If I drew an imaginary line around each subject, we would see that the head is the problem area. The head is usually a main focal point, so it should always have good FGR. If I had gotten higher, the separation would be improved.
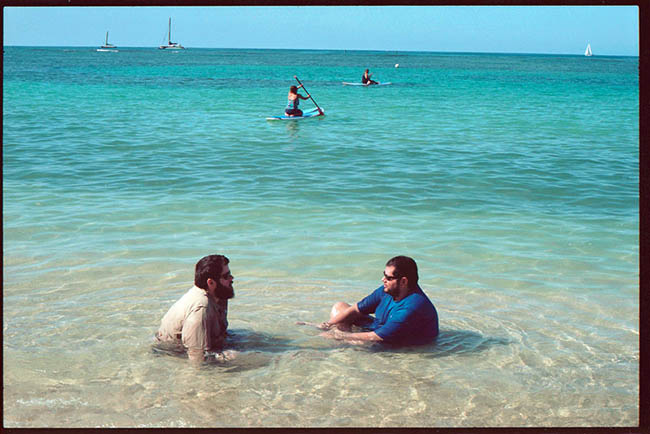
Two grown men, in their shirts, facing each other in the water? This is just funny to me! I tried to create unity with the background by creating a triangle.
A triangle is a simple geometric shape that can be used to create an enclosure (Square and circle can also be used). An enclosure is a Gestalt psychology technique that basically means our mind will close the gaps and unify the objects.
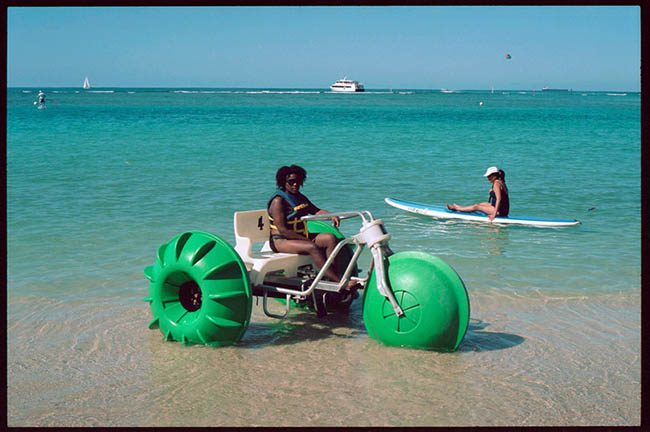
Here’s another triangle being created with the lady on the water bike, the surfer, and the boat. I was hoping to capture the red of the surfers paddle to help with the palette, but no such luck.
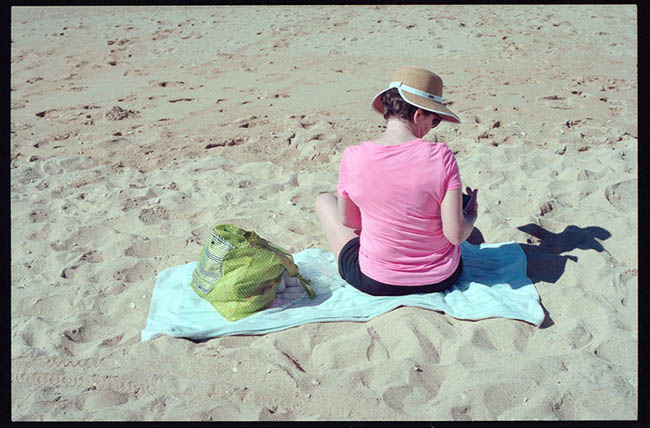
This ladies pink shirt next to the green bag created nice colors, and her hat was interesting. Blue and yellow could’ve completed the color palette. A gesture would’ve added more life to the shot as well.
In the video, I get to talking and try to take this next photo in haste.
You can see where I cut off the mans foot, and there is edge flicker at the top right. The circling lines in the sand might’ve helped the composition if I hadn’t been blabbing away in my monotone voice.
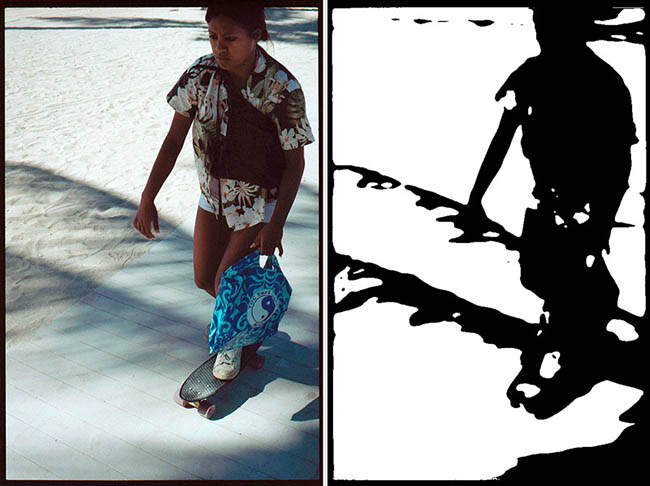
Another horrible shot I took in haste. The girl was riding fast towards me and I didn’t have time to adjust the exposure for her position. I ended up cutting off the head and she is in shadow. When I convert it to black and white, you can see that her shape isn’t clearly defined. The shadows of the tree hurt it even more. Horrible FGR, and no aspective view.
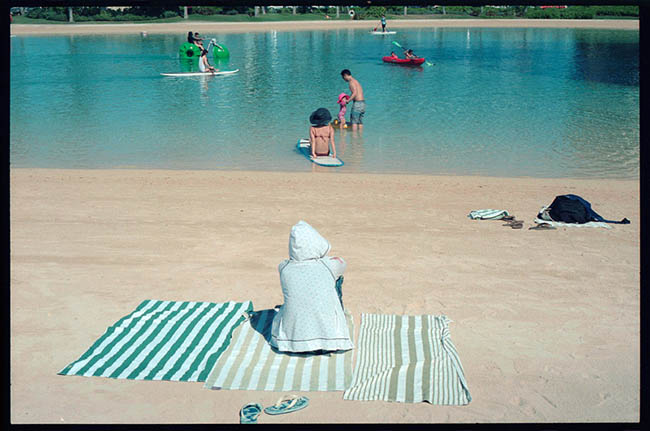
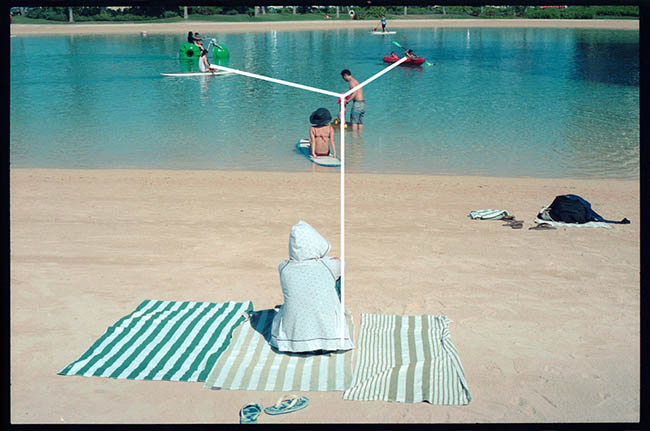
This next photo, I see the repeating patterns of the towels, and the woman sitting in her hoody. Yes, it’s super sunny and hot out. Why does she have her hoody on? This type of thing is funny to me, so I try to unify her with the distant objects.
I waited for the objects to separate a bit, then created a coincidence. It also branches off into a “Y” shape. We also have most of the colors I’m hunting for…red, green, blue…just missing a bright yellow.
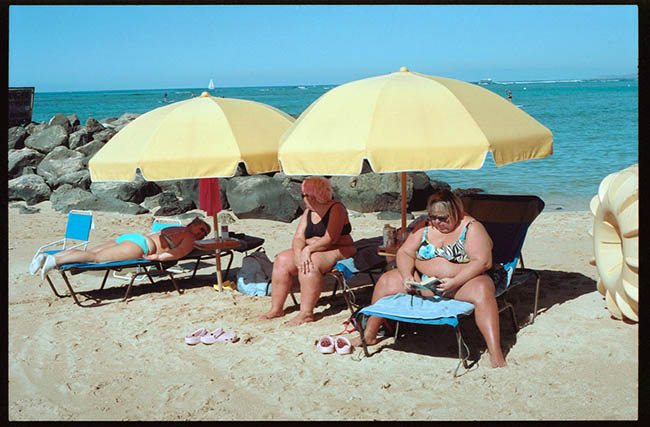
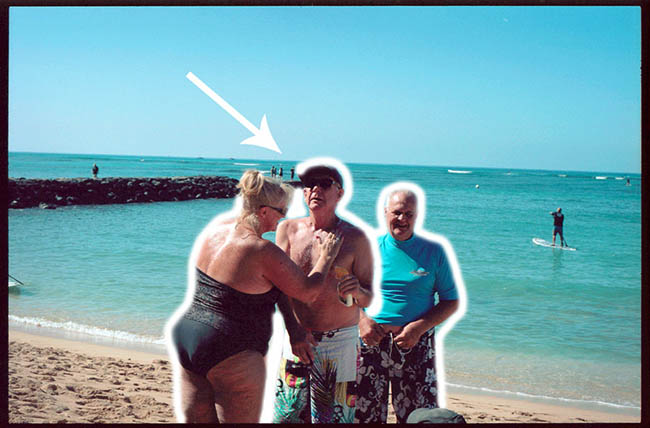
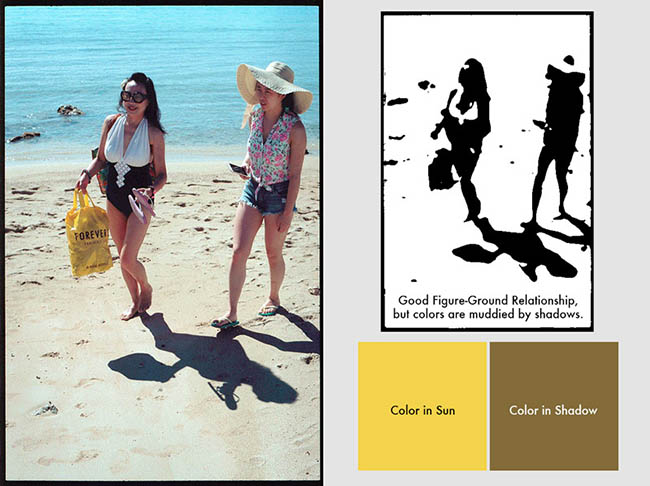
When shooting in the sun, I know that I always want to be on the same side as the sun. This will make my colors more vibrant. I couldn’t resist taking a shot of these ladies. The vintage swimsuit, the huge hat…it’s just too much! There were even decent colors, but I knew that shooting towards the sun would make my colors muddied. I was right.
You can see in the black and white version on the right that the women are mostly in shadow. This makes for a great FGR, and might be good for a black and white image, but the colors are not vibrant. I’m shooting color, so it’s part of my job to capture nice colors. The yellow of the bag in the sunlight is drastically different to the color it becomes when mixed with shadow.
That concludes my adventure into the sun with an old film camera. I hope this inspires you to put more thought into your compositions, and ease up on that trigger finger. These composition techniques can be applied to many forms of art…painting, sculpting, you name it. If you found this helpful, please share these design techniques with others to help improve the future of art. Oh, and check out the video when you get a chance!
Instagram Street Photography: https://www.instagram.com/waikikistreetguerilla/
Flickr Street Photography: https://www.flickr.com/photos/streetphotographywaikiki/
Facebook Street Photography: https://www.facebook.com/waikikistreetguerilla/








March 21, 2016 @ 7:26 am
Hi Stig, thanks for the feedback! I look forward to making another one for you and everyone else. Take care!
Street Shooting Techniques Discussed | Fuji Addict
March 21, 2016 @ 7:55 pm
[…] came across an interesting article today about street shooting techniques that some might find informative, but it made me think about […]
Mastering Composition to Get More Keepers in Street Photography – Layar
October 4, 2016 @ 7:32 am
[…] Mastering Composition to Get More Keepers in Street Photography […]