
Annie Leibovitz- How to Pick the Best Photo of a Series

#704
Hey everyone, welcome back to another in-depth article!
Today we are going to dig into a photography series that Annie Leibovitz did with Jennifer Lopez. Does one photo stand out amongst the rest? If so, how are we able to identify it? What do we look for? Does composition matter? Let’s find out now!
Photo Series Jennifer Lopez
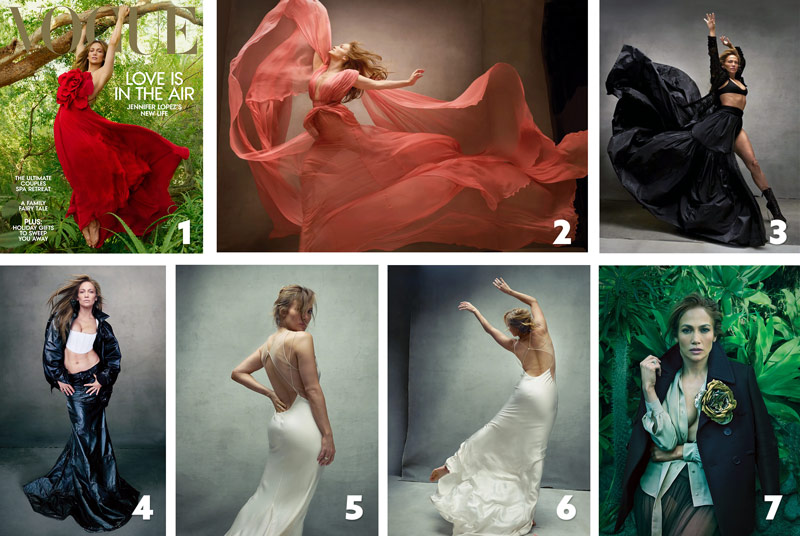
First let’s take a look at the photo series below. Not bad, right? We have to think of this like Jennifer Lopez is the client, and Annie was hired for the job. Annie’s priority is to capture great images that are pleasing to the client. Jennifer might’ve even directed her on some things she wanted in the photos. Good or bad, Annie has to consider her clients wishes. For example, maybe Jennifer wanted the jungle background, but Annie knew it would be more difficult to light…especially when compared to her iconic blank canvases (see #466). She still has to accommodate for the (hypothetical) paying customer.
There are some excellent photos here, but some are noticeably better than the others. Personal taste might play a role in identifying which one looks better than the others, but we’ll rely on our knowledge of composition and design techniques to guide us. Even though Annie is a professional photographer, it doesn’t mean she can’t make some compositional mistakes.
Do you see any yet? Can any of these photos be improved with subtle adjustments? Let’s keep digging!

Composition Techniques Learn to See
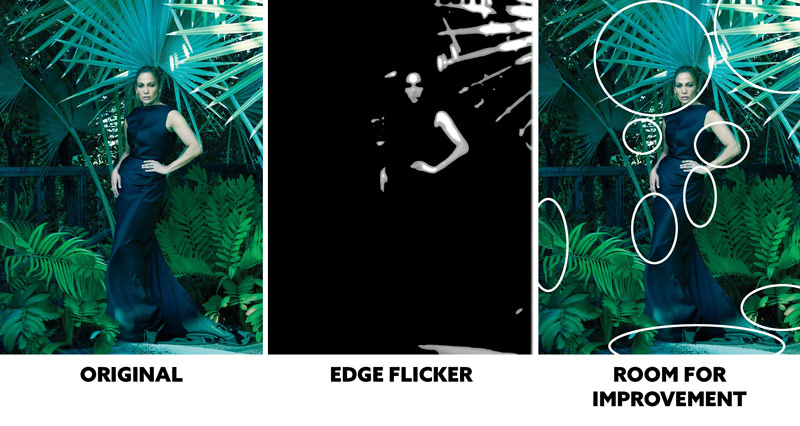
Speaking of jungle backgrounds, they can be really difficult to control…especially if there is natural light entering the frame. In this image, we can see how the sun is hitting the abstract leaves and creating major distractions. It’s gaining way more attention than the model, who looks really underexposed in comparison. When we find the greatest area of contrast (GAC) (see Day 71), we can see how massive the distractions are.
The leaves are beautiful, and the dress isn’t bad either, but the figure-ground relationship (FGR) (see Day 21) is suffering in more ways than one. The dress is dark and mostly on a dark background (squint to see), which reduces our ability to see the model’s shape. There’s also some high contrast areas behind her arm on the right, which mess with the visual clarity. Bad FGR and scattered distractions (see circles) make this one of the worst images of the series, but there is one more thing to make note of if we are going to squeeze the most learning opportunities out of this.
The way her head aligns with the background leaf is a coincidence (see Day48 ), which creates an illusion of her wearing a spiked headdress. Not a bad illusion if it were intentional, but if it were, they would’ve lined up her head to be centered. We can only count this as a compositional error. See? The composition is guiding our decisions.
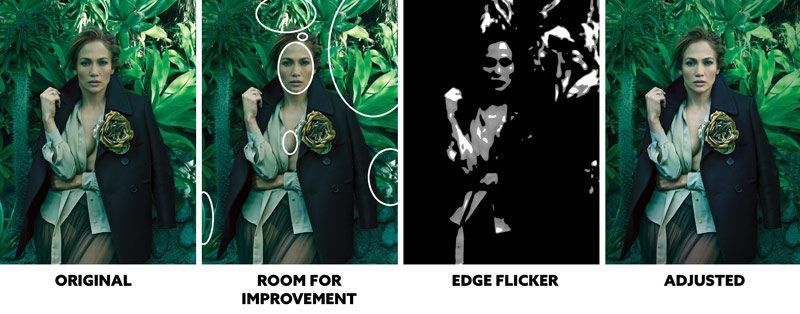
Here’s another jungle background where the main subject is competing with background distractions. There are many areas circled that we can improve. Most of them are distractions, but the others are skin issues. The lighting is underexposed again, and her face looks more skeletal rather than soft and feminine. Subtle softening of the face shadows will help, but she also looks too green. Almost sick. Reducing the green slightly will keep the toning, but also make her skin look more natural.
In the final adjusted image, we can see how the attention comes back to a more attractive and alive model.
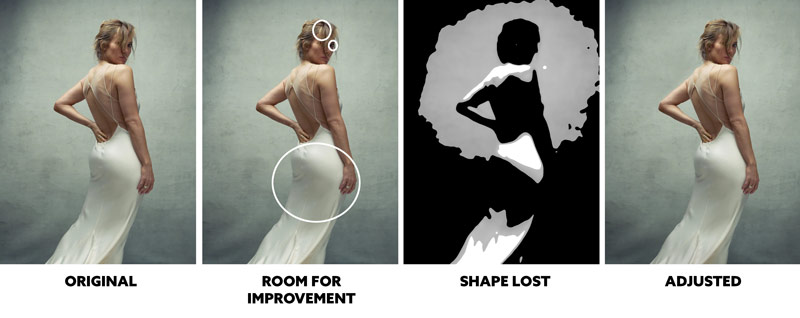
When I first saw this image, I liked the simplicity, but I knew something was missing. Do you see it? The FGR is affected by the white dress shadows on the light gray background. The shape of her body is lost. She also has a hair highlight that creates the illusion of a bald spot. Her eye is really dark too. When all of these things are adjusted, we can see the subtle difference it makes in visual clarity.
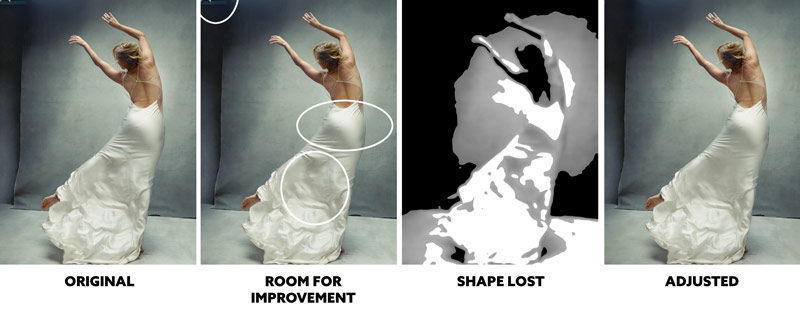
This image suffers from the same FGR errors. Great pose and image, it just needs some subtle adjustments to define her shape better. While we’re at it, take a look at the shadow shapes on the lower dress. They are lumpy, and the one on the left almost looks like she’s got a deformed leg. Not a good illusion to have! When these lumps are smoothed out, we can define her legs better to create something more elegant.
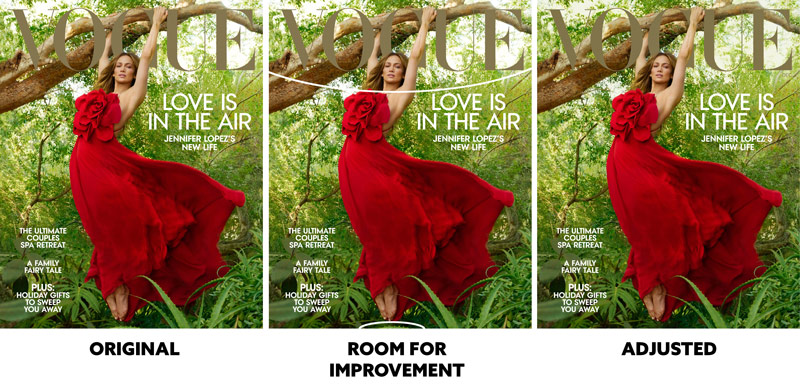
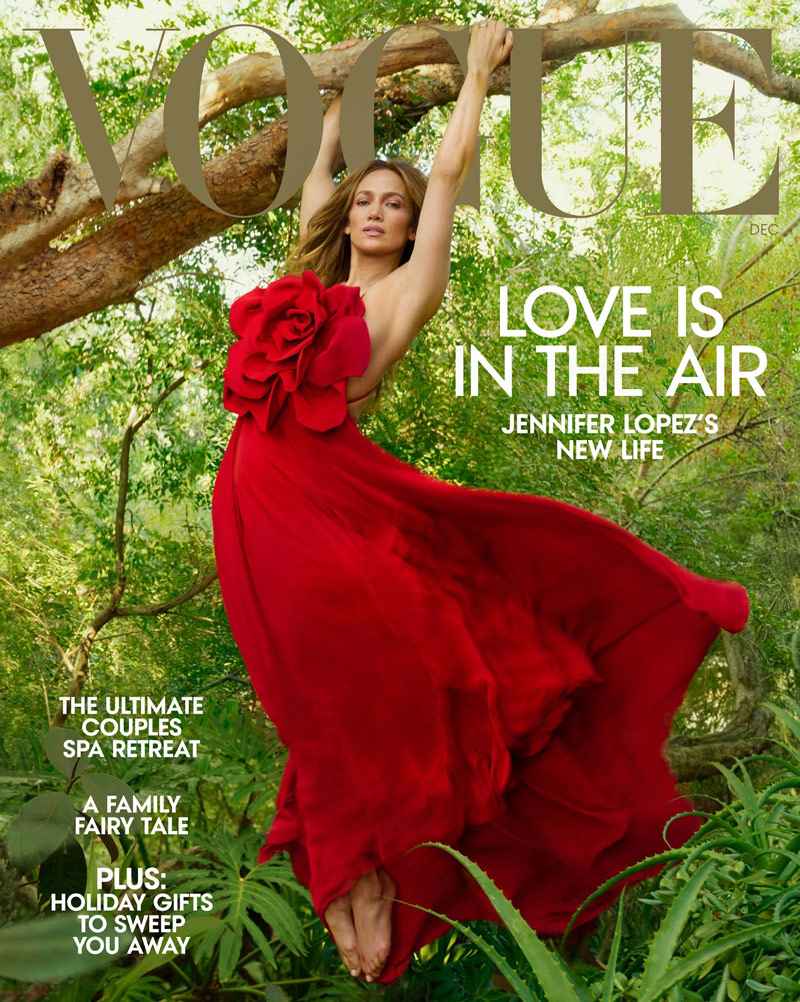
Hmm, this one is interesting. Quite beautiful actually. Oh look at that, it’s the one they chose for the cover. But why? Can we find any errors?
There are a couple of circled areas that we could improve, but it’s nothing major. When measuring the color of the light background it was pure white. We can add a subtle tone to this area so it doesn’t look blown out. The other area by her foot has just a little edge flicker (EF) (see Day 49). It’s nothing too bad, but we can edit out and improve the edges.
The complementary colors (see #615) are great, and the arabesque (see Day 19) of the dress is elegant. Nicely done Annie!
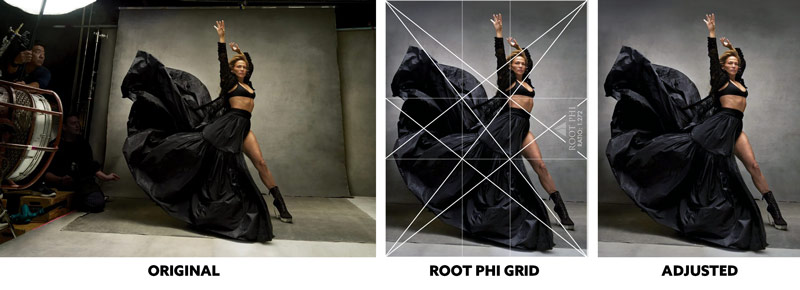
Here’s a behind-the-scenes type of shot. Do you like it? The pose is full of energy, but the guy and light on the left distract from the model. Her face is also blurry, but we can’t do much about that. But what if we simplified the image by cropping out all of the distracting stuff?
When we use the root phi grid to crop the image, we get a stronger image. It tells a completely different story than the original, but it’s a stronger story. It’s all about the model and her energy, not the background employees and their lights. The original looked a little too yellow, so the colors were slightly adjusted too. It all adds up to create a more professional and personal image for Jennifer…the client/model. Perhaps if we couldn’t see the employees on the left and it were just the lights it could be more personal for her as well.
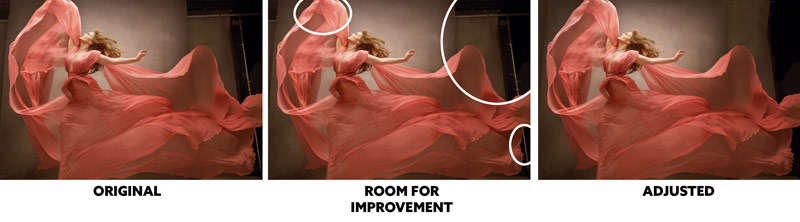
We can see in this image that Jennifer just wanted to feel alive, beautiful and elegant…all at once. I think they accomplished that. This is a great image full of arabesques and energy. There are some background distractions and a little edge flicker at the top, but when all of this is adjusted the image becomes stronger.
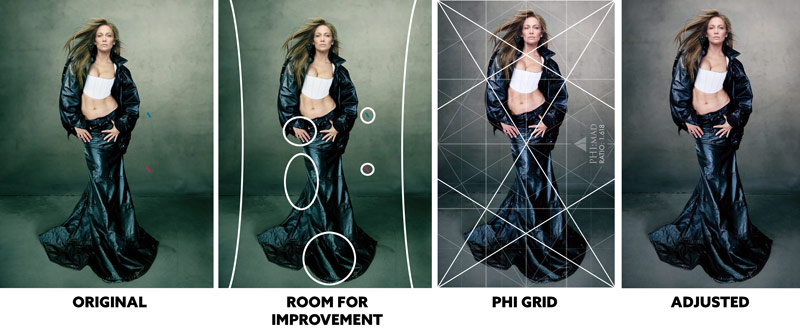
Hmmm, what do we think about this one? The first thing I noticed was that the outfit was kind of unattractive, but that’s my own personal taste. Let’s stick to composition techniques!
The balance is off…that’s noticeable (see Day 57). She is more on the left than the right, and there is a lot of excessive negative space (see Day 83). The background is gaining a lot of attention, but we usually want it on the model. There’s also the colored blue and red tape in the background. This adds color, but it’s not needed and distracts from the model. The curve in the lower dress could be adjusted to create more movement around the bottom dress, and the FGR could be improved. The toning is a little yellow too, don’t you think? The thumb on her left side is awkward too and makes her pose look stiff.
When we adjust everything and crop it to a phi grid, we get something that looks cleaner and more professional. You can still create edgy images (if that’s what Annie is attempting) without purposely adding compositional errors.
Perhaps Annie’s editing team needs a slap on the wrist for letting some of these errors slip through the cracks. Or, maybe Annie is at the age (73) where the little things don’t concern her anymore; she’s comfortable and not interested in the post-processing stuff…kind of like Henri Cartier-Bresson (see #511). I would hate for her to lose her touch, but I’m sure the time is coming soon.
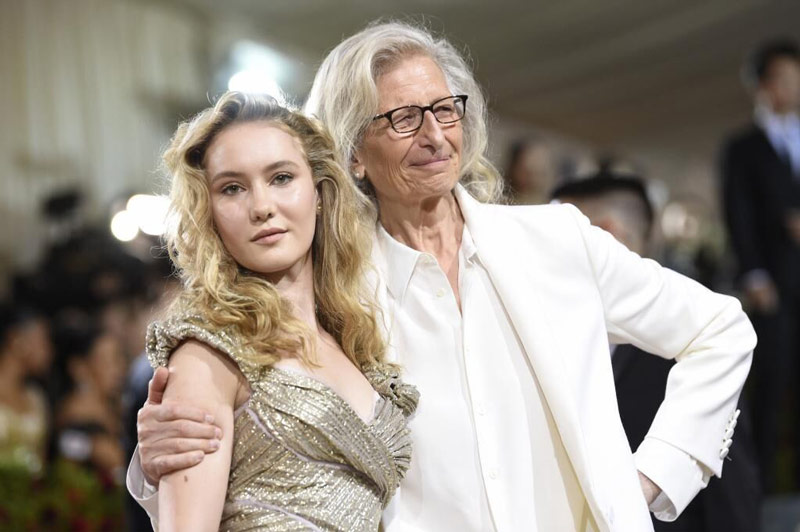
Here she is with her daughter in a recent photo.
Conclusion
Whatever the true reason for the errors, we now know that we can rely on our knowledge of composition and design techniques to pick the best image of a series. We can even use them to improve any image errors.
In the images below, we can see the adjusted versions and the order (I believe) they rank. A lot of them are equal (4, 5, 6), but the first one stands out amongst the rest. And would you look at that…it’s the one they selected for the cover. Either that is a literal coincidence, or most of us can identify a really beautiful image when compared to others. The secret is being able to identify what makes an image successful and it’s usually the compositional basics; GAC, FGR, Negative Space, Balance and Edge Flicker.
Here’s the adjusted cover to see more details. Without the “Vogue” title, the image would be even better (see video).
That’s it for today, thanks for joining in and being a Master Pass member. See you in the next one!
")
")
