Dynamic Symmetry: How to Easily Understand Ratios (Super Simple)
#557
Welcome back everyone, thanks for all of the amazing support!
Today we are going to be learning how to simply understand the dynamic symmetry ratios. In the diagrams and video below, you’ll definitely be more confident in your abilities to create different grid variations for your next masterpiece. Let’s get into it!
Understanding Ratios The Importance of
If you’re wanting to completely understand everything dynamic symmetry has to offer, it’s absolutely crucial to understand the ratios. Sure you could use simple and complex grids that are already constructed, but if you’re wanting to build them yourself you need to have a grasp on the simple math involved. Worry not, because in the video further below I will use children’s blocks to show just how easy it can be.
You know how our breath isn’t visible unless it’s cold outside or we’re blowing bubbles underwater? Math is like this to visual artists. We don’t really understand what it is until something makes it visible. These blocks allow us to see the math in a visual way.
I’ve tried to simply explain the ratios before (see #514), but since some of the ratios were “irrational” (not even), it still seemed difficult to some artists. The great thing about this video is that I’m just covering the grids that can be constructed by an even amount of squares. This makes them extremely simple to construct! I’m also showing how it relates to the grids and how it applies to painting and photography. Once you finish watching the video, try to go back to the previous article (see #514) and see if things are clearer for you.
The Break Down Dynamic Symmetry
If you’re a painter or photographer, you’ve definitley used different ratios for your art. Whether or not you’re aware of that fact will become clear as you watch the video. There are a ton of canvas sizes that share the same ratio.
What does it mean to “share the same ratio?”
Well, if we take a 36×24 canvas and divide the small number into the large number, we’ll get the ratio of the canvas, which is 1.5 (36 / 24 = 1.5). If we take a 6×4 canvas and do the simple math, we’ll have the same 1.5 ratio (6 / 4 = 1.5). The canvases are different sizes (big vs. small), but still the same shape. Much like a big square compared to a small square…it’s still a square.
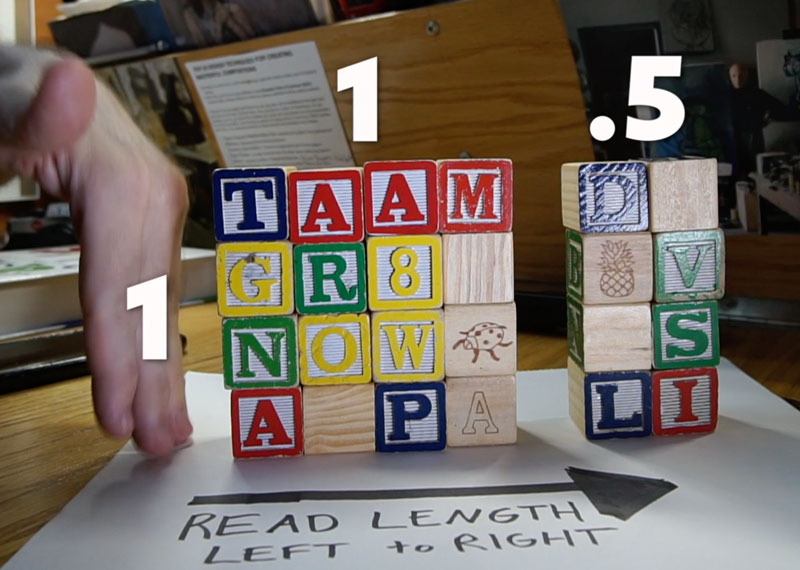
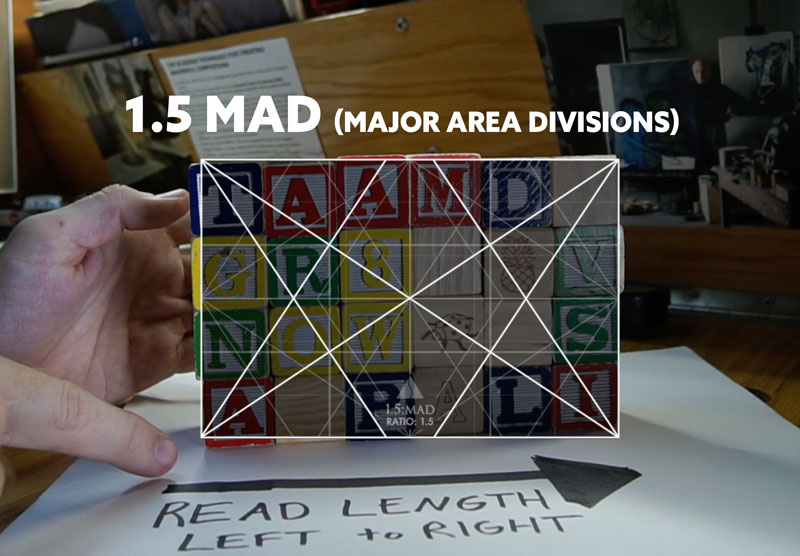
Within the video, we start super simple by demonstrating how to read the ratios from left to right and with the left side always equalling one. In the screenshot, you can see how the left square equals one, and the half square equals .5. Add these together and you get the 1.5 rectangle. It doesn’t get simpler than this!
Note: The square is a unit of measure and is relative, meaning it can equal a mile, an inch, a foot, a meter, millimeter, it doesn’t matter.
This 1.5 shape relates to the 1.5 grid. See how there there are several squares creating the “mother” shape below? There’s a total of six on the bottom and four on the left side (Total 24). This means we can break down the squares to represent four smaller 1.5 rectangles inside the mother. Confused already? No need to worry, it’s all clearly demonstrated in the video.
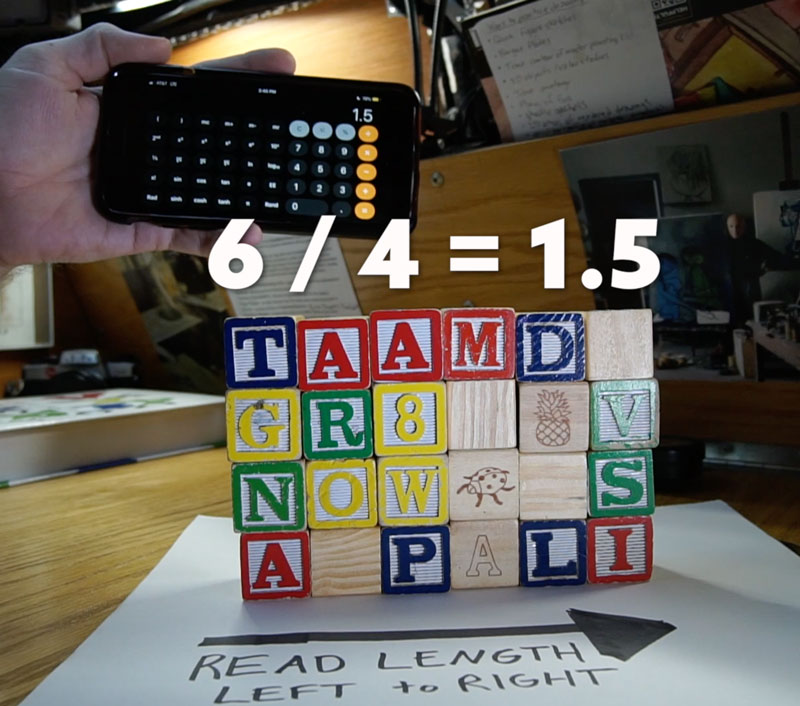
In the video, I also show how you can use a calculater to push the dynamic symmetry further and help with the ratios. The screenshot demonstrates how the six blocks by four blocks equals the 1.5 shape (6 / 4 = 1.5).
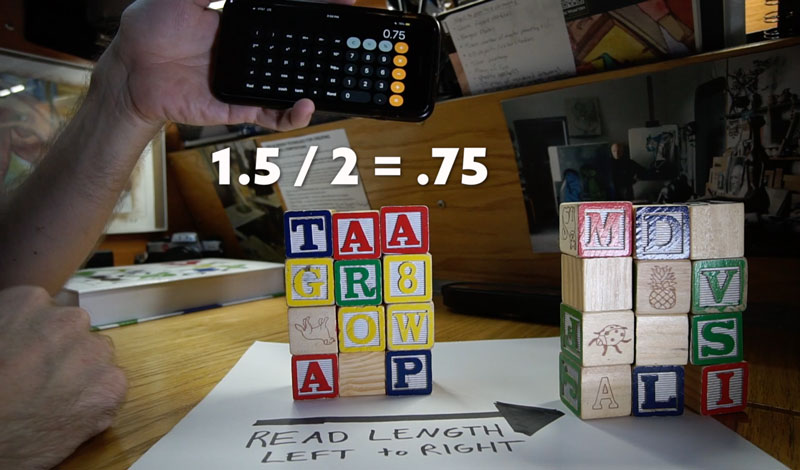
Another important thing to understand is what happens to the ratio when we stack rectangles or cut them in half. For instance, what if we took the shape of the 1.5 ratio and cut it in half? How would we calculate the ratio?
The answer is in the question.
We would simply take the 1.5 ratio and cut it in half by dividing by two, giving us a new ratio of .75 (1.5 / 2 = .75). One way to double check our math and see it visually is to look at the blocks presented before us. If we take three blocks and divide it by four blocks (since they are stacked three by four in the example below), we would get .75 (3 / 4 = .75).
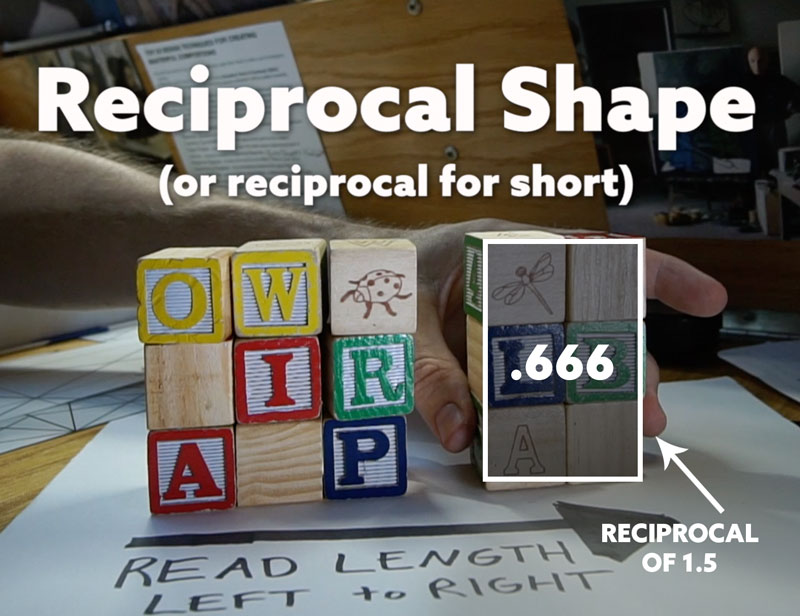
Whenever we talk about the reciprocal shape or “reciprocal,” we are referring to the mother root rectangle rotated 90 degrees. Visually all that is happening when we rotate a shape 90 degrees is that we are reading the length of the shape differently. Since we read from left to right and the left side always equals one, we are essentially making the shape shorter when it’s rotated to create a reciprocal.
This means that the .666 shape seen below is a 1.5 rectangle rotated 90 degrees. In the video I show how easily this can be discovered on a calculator to help construct your own grid variations.
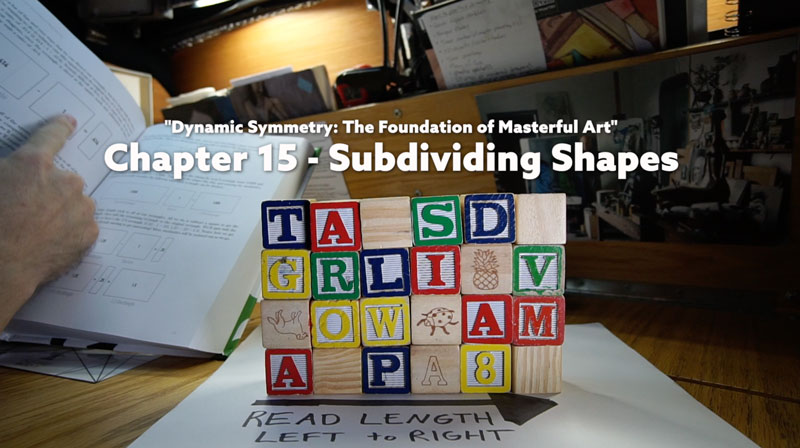
In Chapter 15 of “Dynamic Symmetry: The Foundation of Masterful Art,” I cover subdividing shapes. The things covered in the video reflect a portion of what is covered in the book and shows just how simple it is to divide and combine shapes for your art.
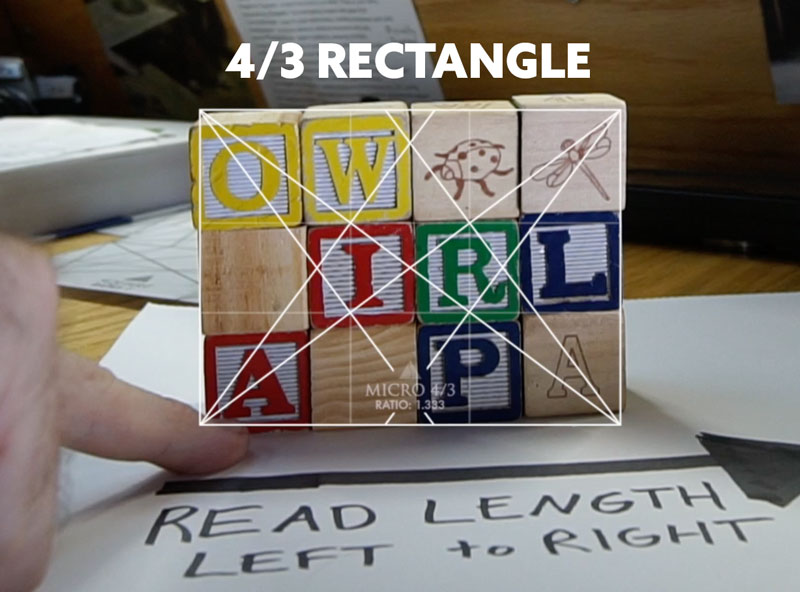
In the next image, we can see how the 4/3 rectangle can be constructed with 4 squares by 3 squares. This is another popular size for photographers and painters.
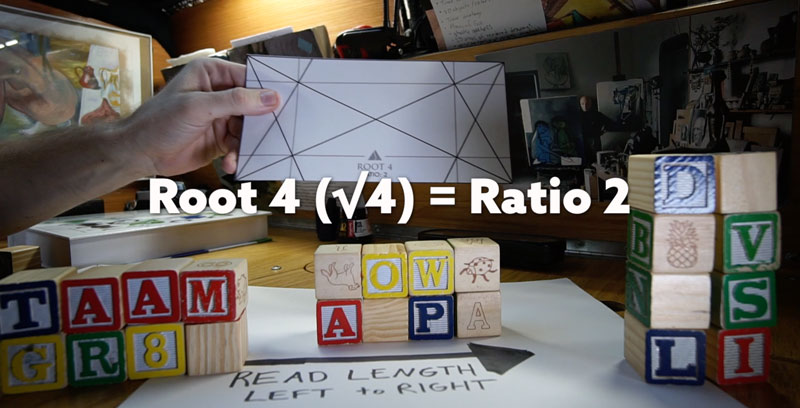
This next simple example is straight from the book. We take the 1.5 ratio, add .5 (half a square), to get a new ratio of two. This is the ratio of the root 4 grid! This means the root 4 consists of two squares.

Here we can see the root 4 grid with it’s ratio and how it is shown in the wooden blocks.
You’ll learn how to calculate stacked rectangles as well. How ever many rectangles you stack, you always divide the original ratio by that number. So if you take a root 4 rectangle, which has a ratio of 2, and you stack it three times, what do you think we would get? We would take ratio 2 and divide it by three, giving us .666 (2 / 3 = .666). Does this ratio look familiar? It’s the 1.5 reciprocal shape!
See how they all relate to each other?
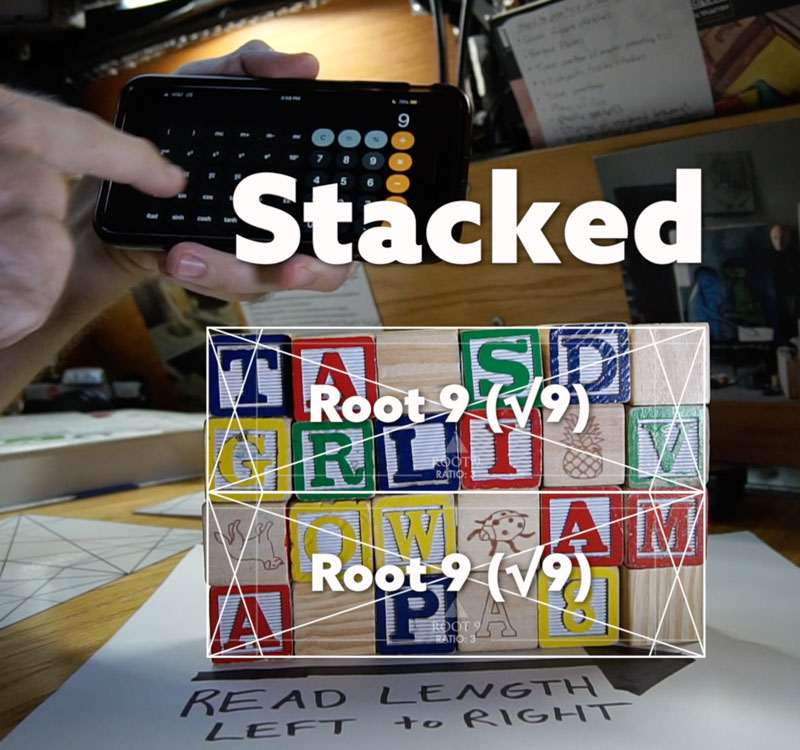
In the image below we see root 9 rectangles stacked twice. What is the new ratio? Well, if we take the root 9 ratio of three and divide by two (since two are stacked), we get 1.5. Easy! So two stacked root 9 rectangles equals the 1.5 rectangle, which can be used in paintings and cameras.
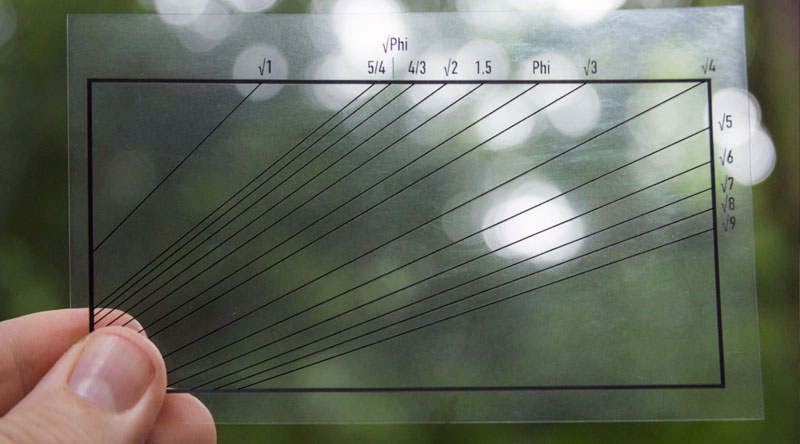
I’ll breifly discuss another section of the book where I explain how I used the diagonal gauge to find the diagonal of a tree, then composed it with stacked root 9 rectangles.
Here’s the final image where you can see the fallen tree in the distance and how the stacked root 9 rectangles were used to compliment the major diagonal of the scene.
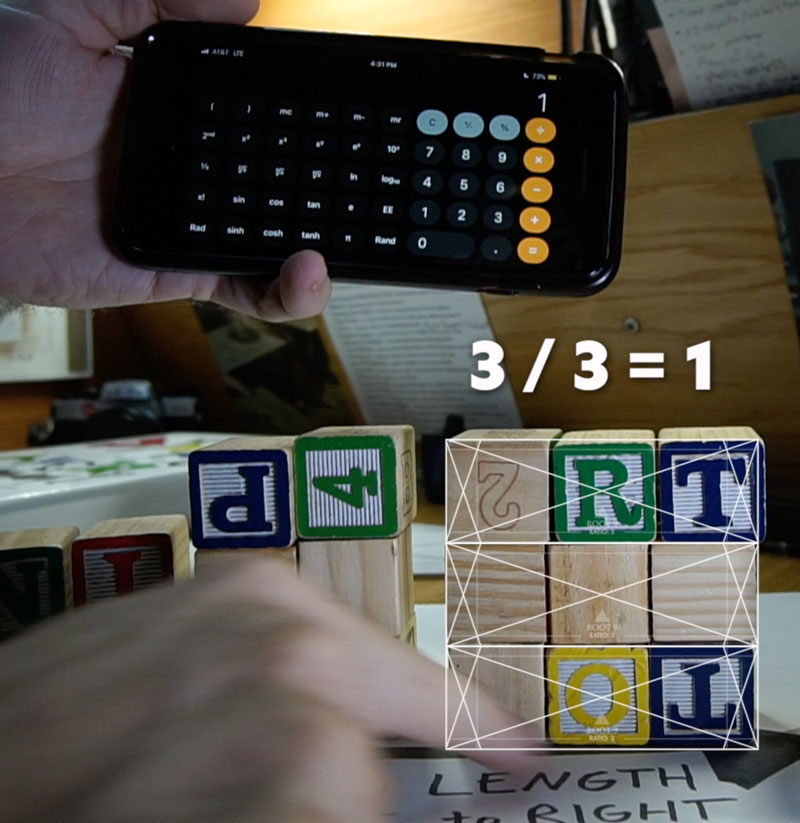
Remember, when we stack, we always take the original ratio and divide it by how ever many stacks we have. So in the example below, we have the root 9 stacked three times, so we take it’s ratio of three and divide by three, we get one.
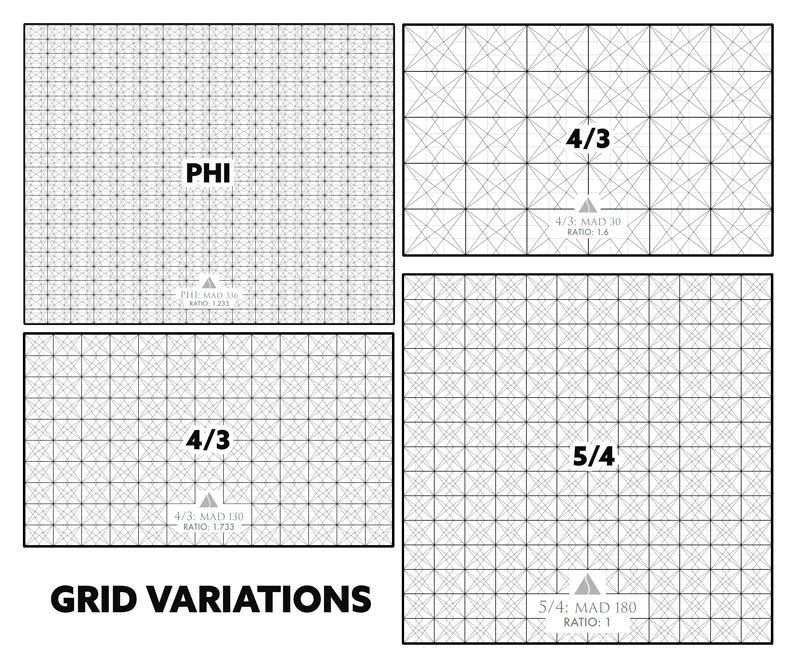
Once you get a grasp on these ratios and that we are basically just stacking shapes, we can create more complex grids as seen below. These were all constructed in the same way that the children’s blocks were. This leads us to compound rectangles (see Day 155), themes of rectangles (see #438), and overlapping rectangles (see #419).
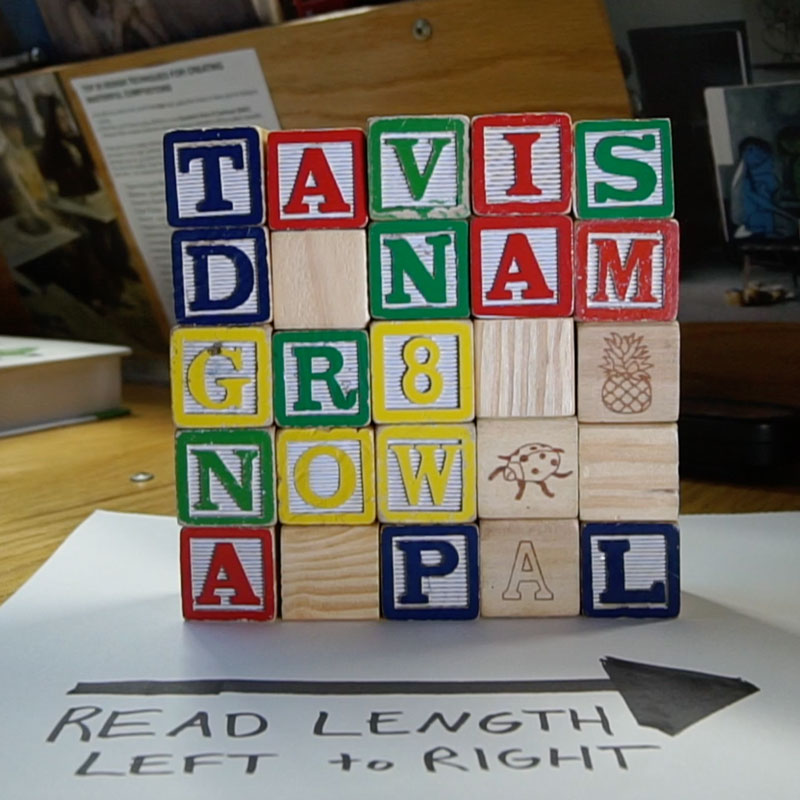
The finale of the video is to take the large square and break it down into smaller grids. Can you look at the blocks below and see the subdivisions and different shapes within it? Try to guess which grids are present, then watch the video to see some variations that are found. There’s more than one answer!
Dynamic Symmetry Ratio Video
Please enjoy the video and be sure to swing by YouTube and subscribe 🙂
Conclusion
If this is still too difficult to understand, just take baby steps. Understanding the ratios is essential to getting the most out of what dynamic symmetry has to offer. Use the calculator if you’re trying to figure out the ratios or designing a complex grid.
That’s it for today, thanks so much for joining in! If you like this, please share with your artistic friends. Help them understand more about dynamic symmetry!

