John William Waterhouse – ANALYZED PAINTING #2

#569
Welcome back everyone, much love for all of the continued support! It’s appreciated tons!
Today we are going to look closely at this amazing painting by John William Waterhouse and learn what it’s all about. What techniques did this master use, and what techniques could be improved? Let’s find out now!
Orpheus The Tragic Story of
Orpheus is one of the main subjects in the analyzed painting further below. He’s a character from Greek Mythology (see Day 230 & Day 231), and like most Greek Myths, his life was full of tragedy. He was a hero that had a musical instrument called the lyre, and played it with God-like skills. You can see it floating by his head in the painting. Yep, his head only…no body to be found.
He had a beautiful wife named Eurydice that tragically died by a snake bite. She was running from a sex-crazed Satyr trying to have his way with her, when she fell into a snake pit. Talk about bad luck! Orpheus was so shattered by her death that he traveled to the Underworld and begged the God Hades for her life, so they could happily return and be together. Orpheus showed off his musical skills and they were blown away with the melodies he was creating with the lyre.
Hades allowed him to take his wife back, but he wasn’t allowed to look back until they both reached the surface. I bet you can guess what happens next. Just before they reach the surface, Orpheus is so amazed by the sunlight that he looks back to his wife to make sure she’s ok and share the amazement of beauty. Sadly he looked back too soon and she faded back into the Underworld. Talk about a major “whoopsy-daisy!” I don’t think they had Tinder back in those days either, so It’s not like he could find a wife replacement very easy.
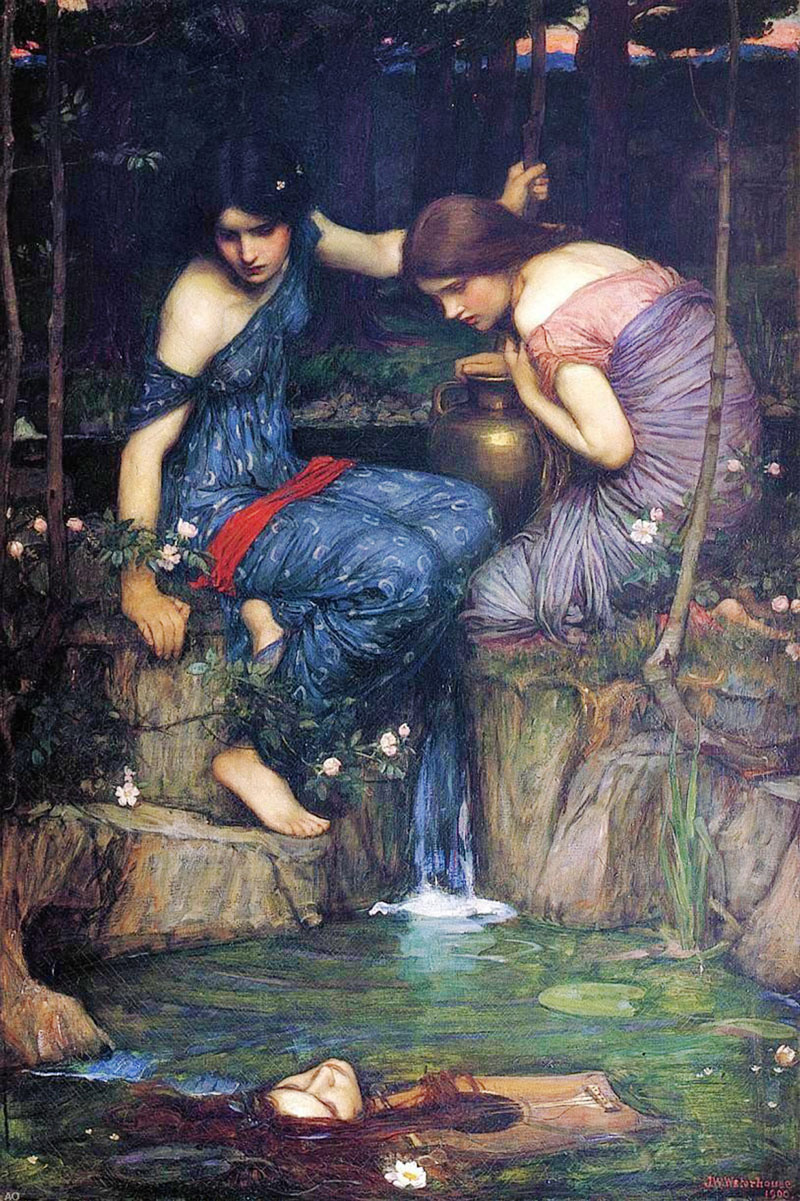
He must’ve lost his mind after that, but he actually didn’t lose his head until later. He was “Team Apollo” (God of the sun), but when he went to pay tribute to the sun he was caught by the maenads (mad women) who were “Team Dionysus” (God of fertility and wine). One thing led to another, and Orpheus was dismembered for not believing in Dionysus, and that was that. Next thing you know, his head and lyre were floating down the river; and still singing, which is weirdly creepy. John William Waterhouse created an interesting scene where his head is discovered by two beautiful nymphs, and we’ll analyze it in a second.
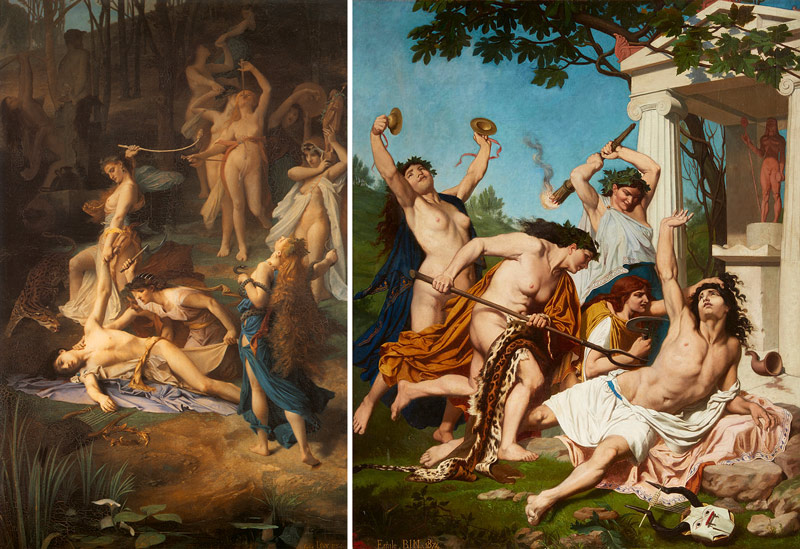
In the next painting on the left by Emile Levy, you can catch a glimpse of the maenads, who were the drunk, dancing, crazy women that killed Orpheus. They carried long sticks wrapped in ivy and tipped with a pine cone called “thyrsus,” but it’s unknown if these were the murder weapons. Maybe they whacked him till he fell, then the girl with the sickle did rest.The painting next to it, by Emile Jean Baptiste Philippe Bin, shows similar weapons that the maenads used.
John William Waterhouse Analyzed
Now that we know more of what the painting is about, let’s see how John William Waterhouse used composition and design techniques to create it.
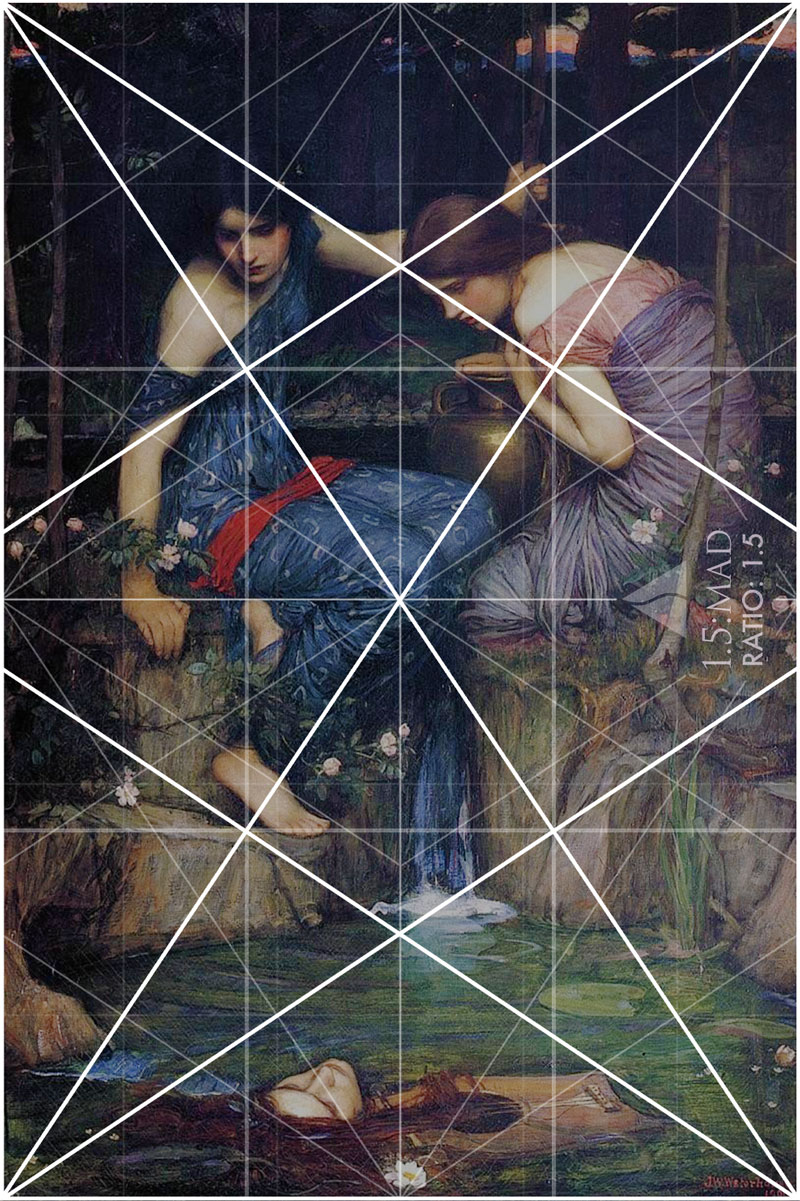
1.5 Rectangle Basic Armature
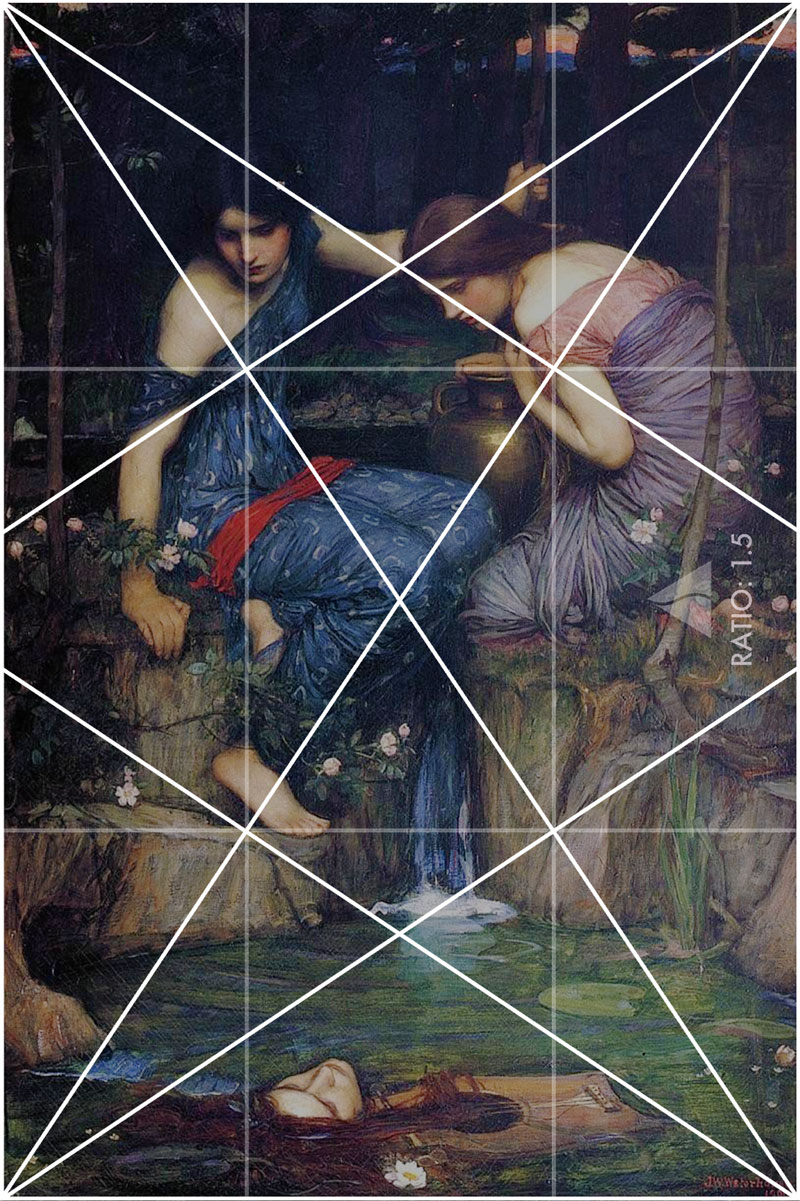
The dimensions of the painting are perfectly aligned to the 1.5 rectangle. It’s also the same dimensions as two stacked 4/3 grids, but the 1.5 locks in more of the painting and matches the diagonals nicely.
Notice that the girl on the right has her arm and face locking into the sinister reciprocal. The other girl on the left has her nose locking in, and her red sash and foot are paralleling the grid. We’ll see more areas locking in as the grid is further developed.
1.5 Grid with MAD
Here’s the 1.5 grid with the major area divisions (MAD) locking in more areas. We’re seeing many more things locking in, like the arm, hand, and foot of the girl on the left. The girl on the right is also locking into more areas and so is the environment, like the flowers. Sure, the more lines, the more things will lock in, but we’re getting specific diagonals that match the grid.
Look at the girl on the right and how the bottom of her left arm is exactly matching the diagonal of the 1.5 grid. The girl in the blue dress also has her right leg, arm, and left hand lining up exactly to the baroque diagonal and verticals. Waterhouse is using the grid perfectly!
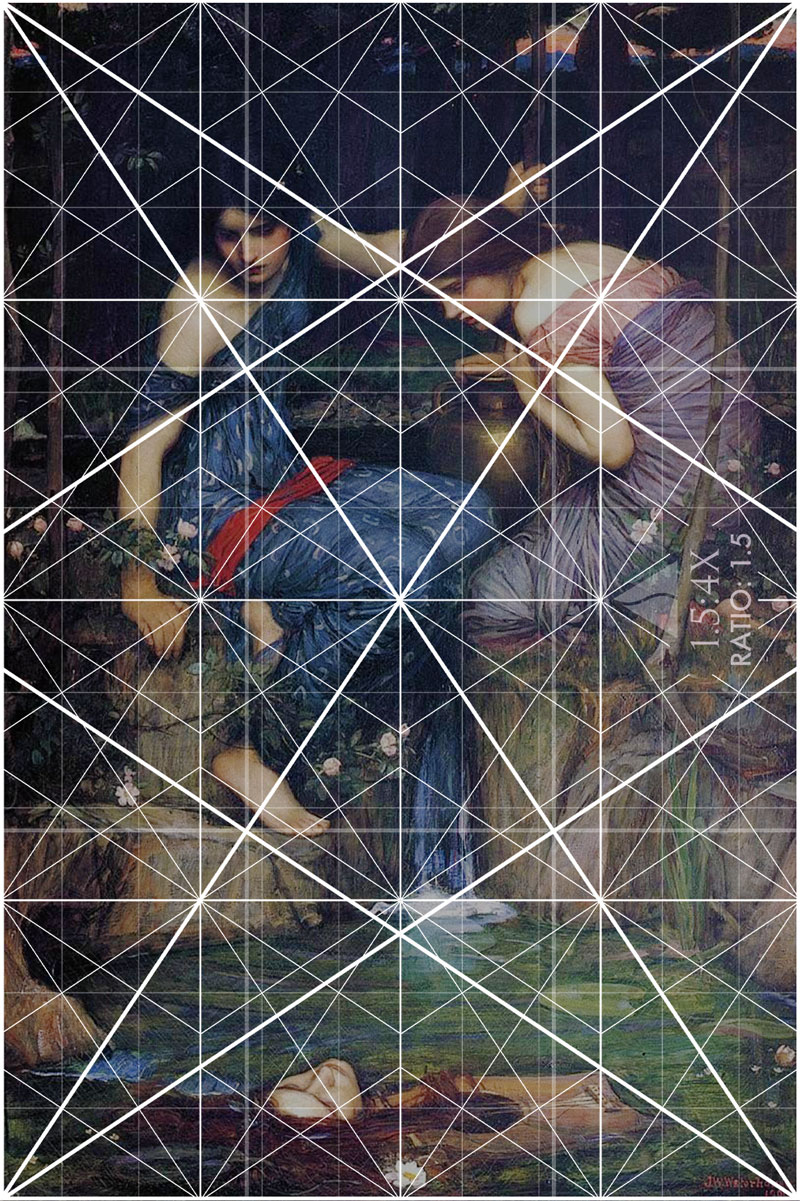
1.5 Rectangle 4x
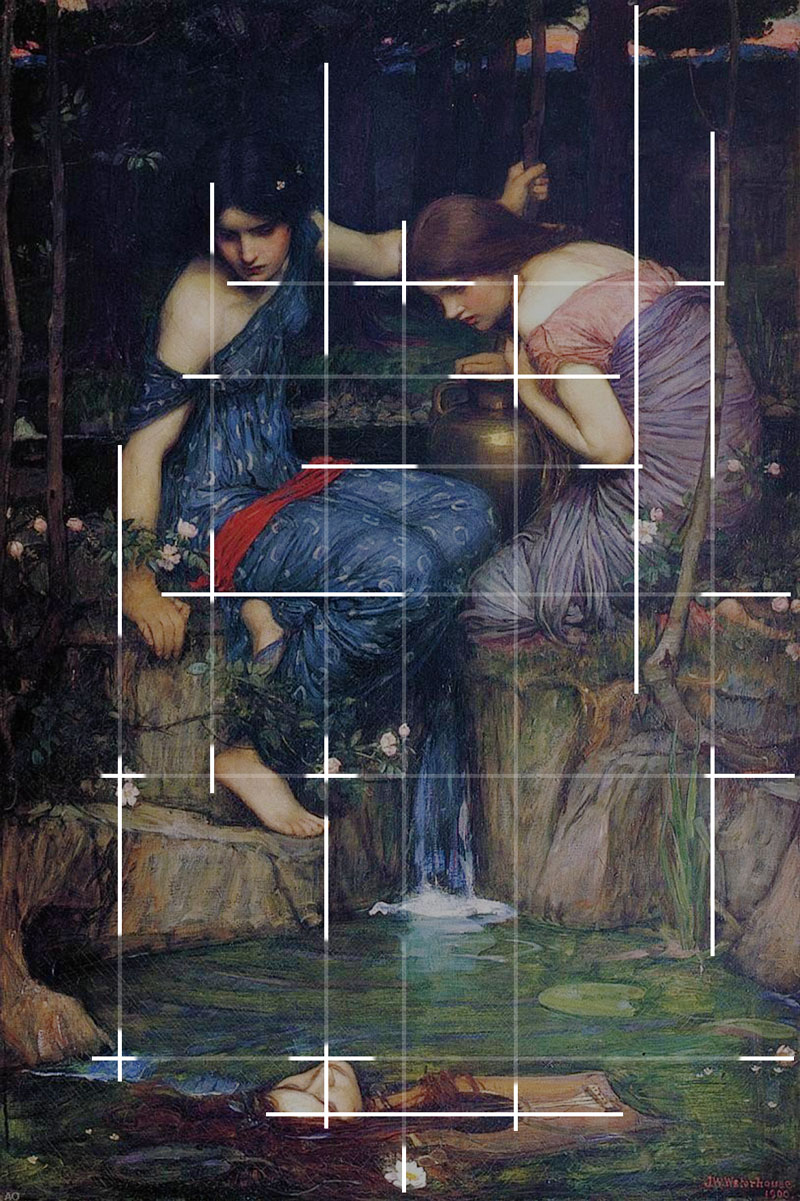
We can break the grid down even further to help organize the smaller elements of the canvas, and it looks like that’s what Waterhouse did. When 16 smaller 1.5 rectangles are overlaid onto the painting, we can see how the smaller elements were lined up. Now we can see the trees in the background locking in as well as the flowers, head of Orpheus, his lyre, and more.
Locked Into the Grid
This will show most of the areas locking into the refined 1.5 grid system. Use whatever grid system you need to get the results you want. They can be combined in many, many different ways.
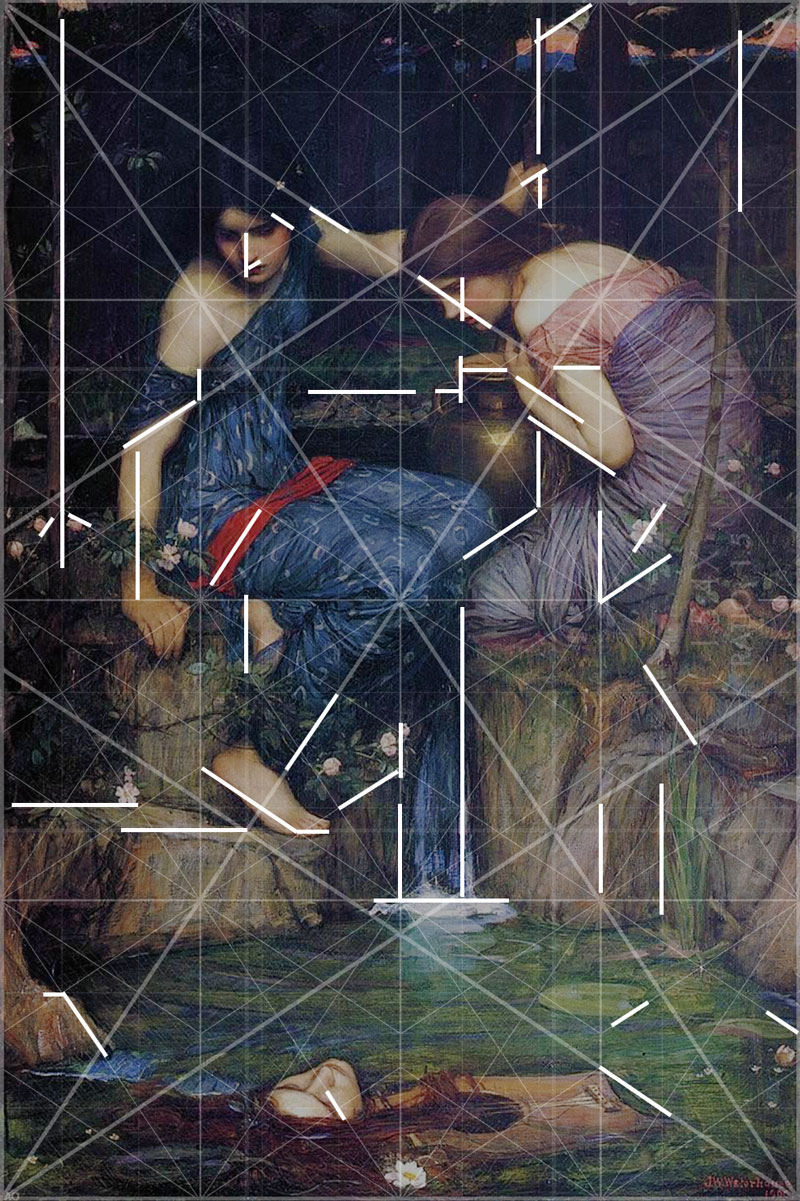
Gamut
With four diagonals of the 1.5 grid, we can see the hidden repetition Waterhouse has infused into his painting. When we use a gamut (see Day 38), a limited number of diagonals, we are able to create this rhythm and make the viewer feel it. They won’t be able to identify the magic trick you’re performing in front of them, but they will certainly appreciate it.
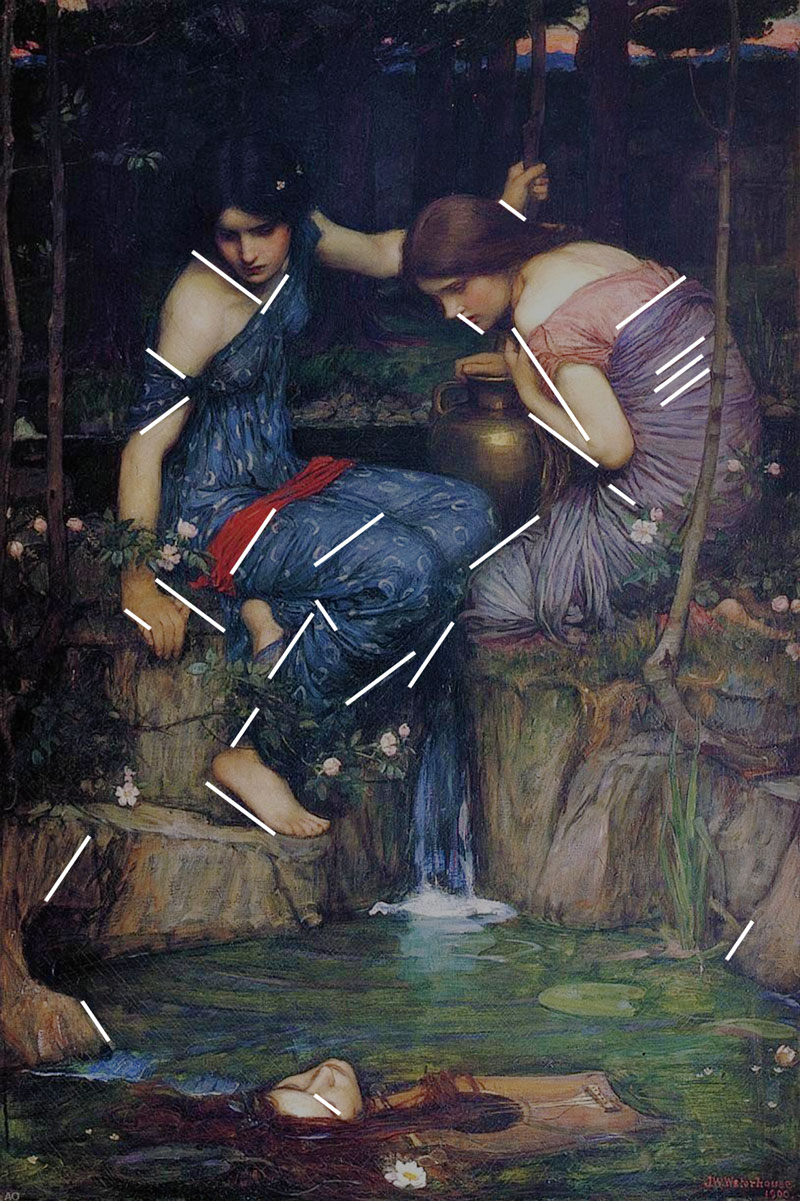
Coincidences
When we use the grid, we are able to effortlessly create unity and movement with coincidences (see Day 48). Follow the lines and you’ll see that the girl on the left has her chin aligning with the hairline and eye of the girl on the right. The head of Orpheus coincides with the rock, her toe, the flower, and the tree in the background. Tons of coincidences, all masterfully incorporated into the design!
90 Degree Angle
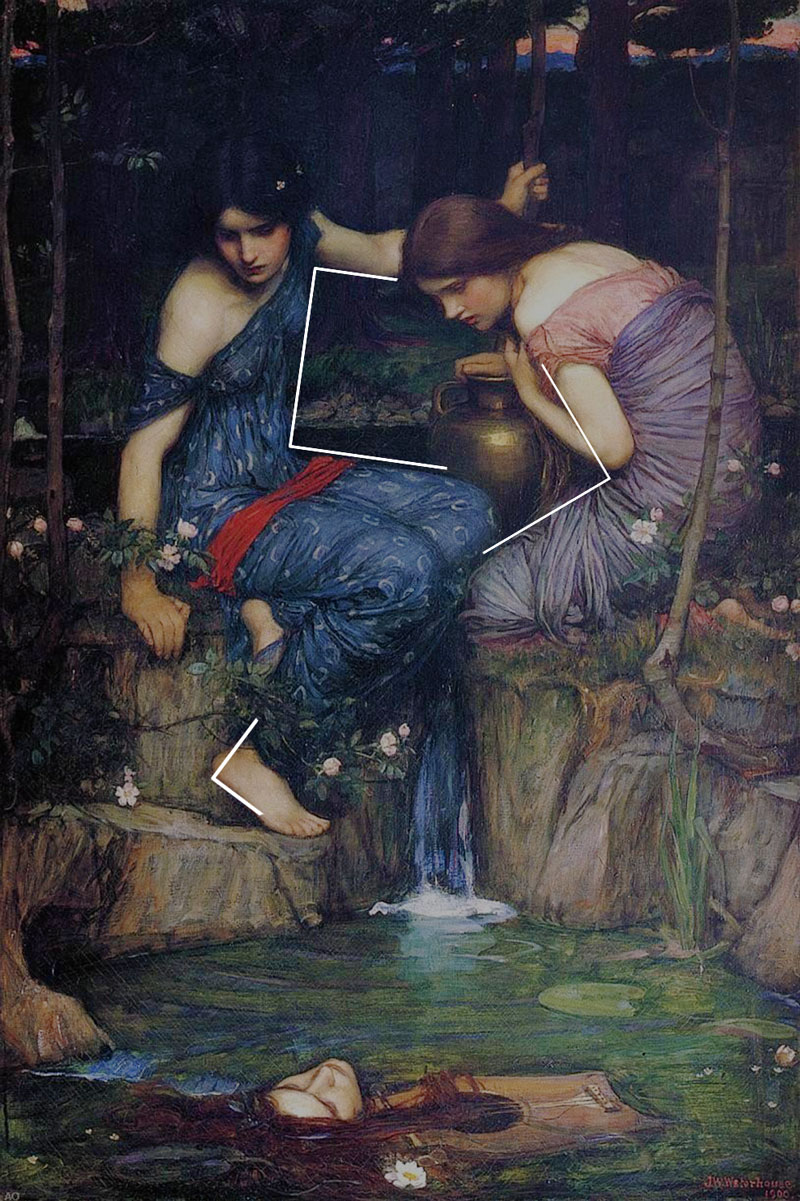
We’ll see how Waterhouse uses the 90 degree angle (see Day 76) to create a sense of strength in the composition. Especially the bond between the two girls. The grid will promote these 90 degree angles as well. The more you use the grids when drawing or painting, the more you’ll start to see how the 90 degree angles can happen automatically.
Arabesque
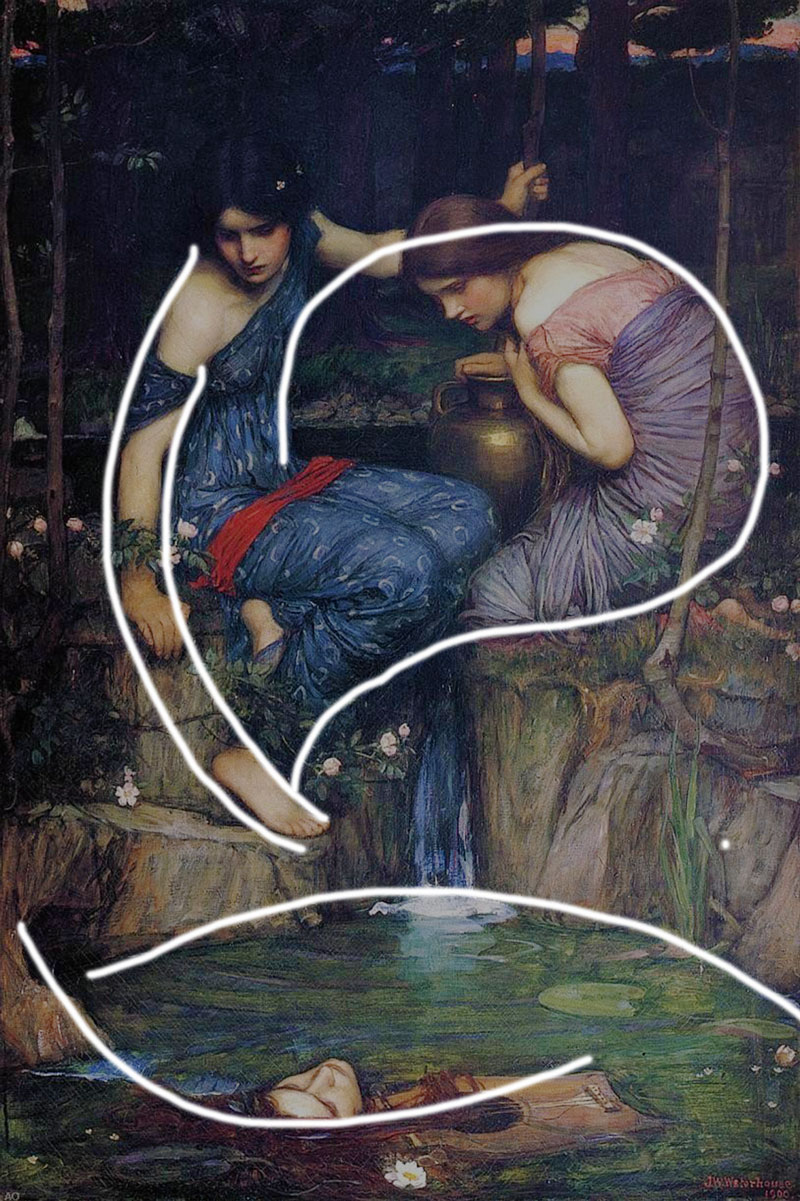
Waterhouse uses several sweeping arabesques (see Day 17) that create movement and unity within the composition. Notice how it swoops from one girl to the next, then down to Orpheus. These elegant lines of continuity add beauty to the painting as well.
Breathing Room
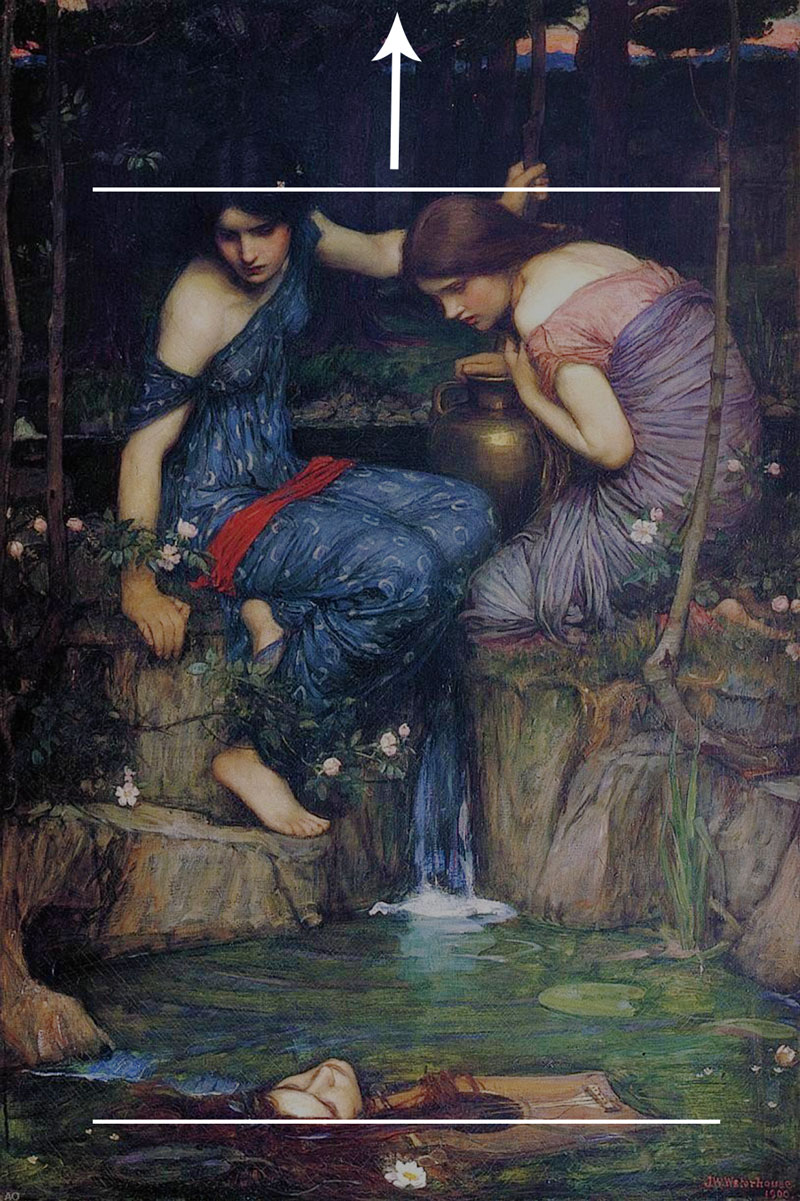
When we measure the bulk of the painting, we will find that the balance is going from bottom to top, like most paintings. See how there is more negative space at the top? That means the painting is weighted towards the bottom. It’s an approximation, but definitely helps you to start seeing how you can properly read visual balance.
Gazing Direction
The gazing direction is pretty much balanced from left to right, and we can see the back and forth gazes of the nymphs and Orpheus. The girl on the right has the body language and facial expression of someone that is completely disgusted by the discovery of a floating head in their watering hole. Sorry Orpheus, your beautiful singing and long hair doesn’t impress the ladies! Keep on floating!
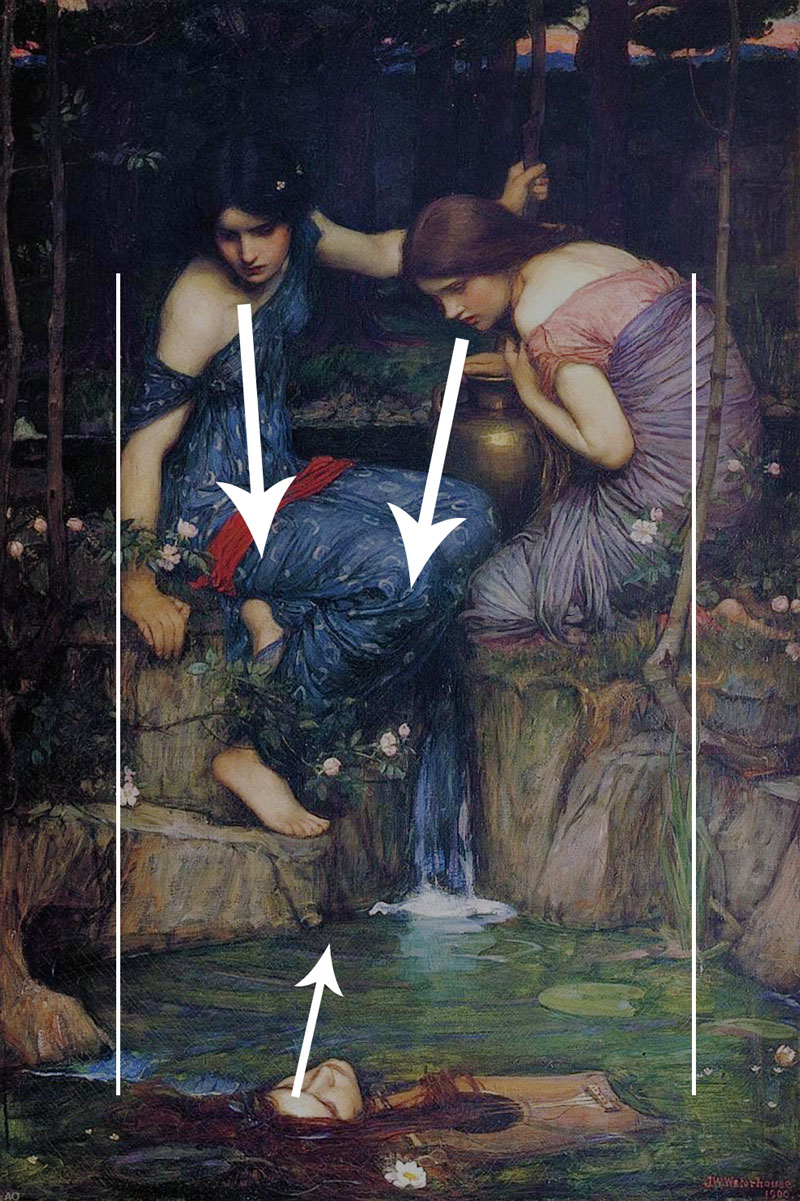
Figure-Ground Relationship (FGR)
The figure-ground relationship (see Day 21) helps define the subjects, but the girl on the left has a few areas that don’t have sufficient contrast. Her dark hair is on a dark background, and her dark dress falls into the dark background in two areas. Lost edges is perfectly fine for paintings, but maybe the dark area on the left could have more contrast. Maybe Orpheus’s red locks could be more defined as well.
Aerial Perspective
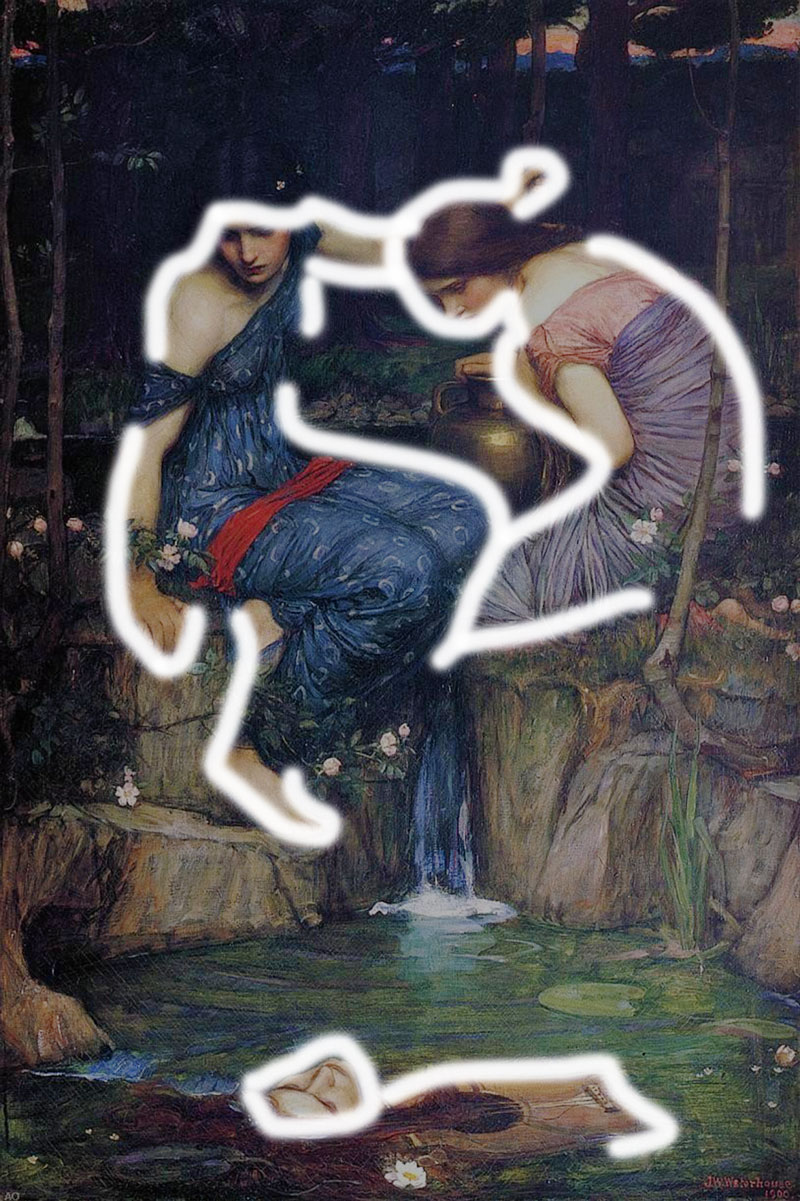
There’s nice aerial perspective (see Day 42) being used to help create the sense of depth in the painting. Notice how the contrast of objects reduces in the distant forest.
Black and White Blur
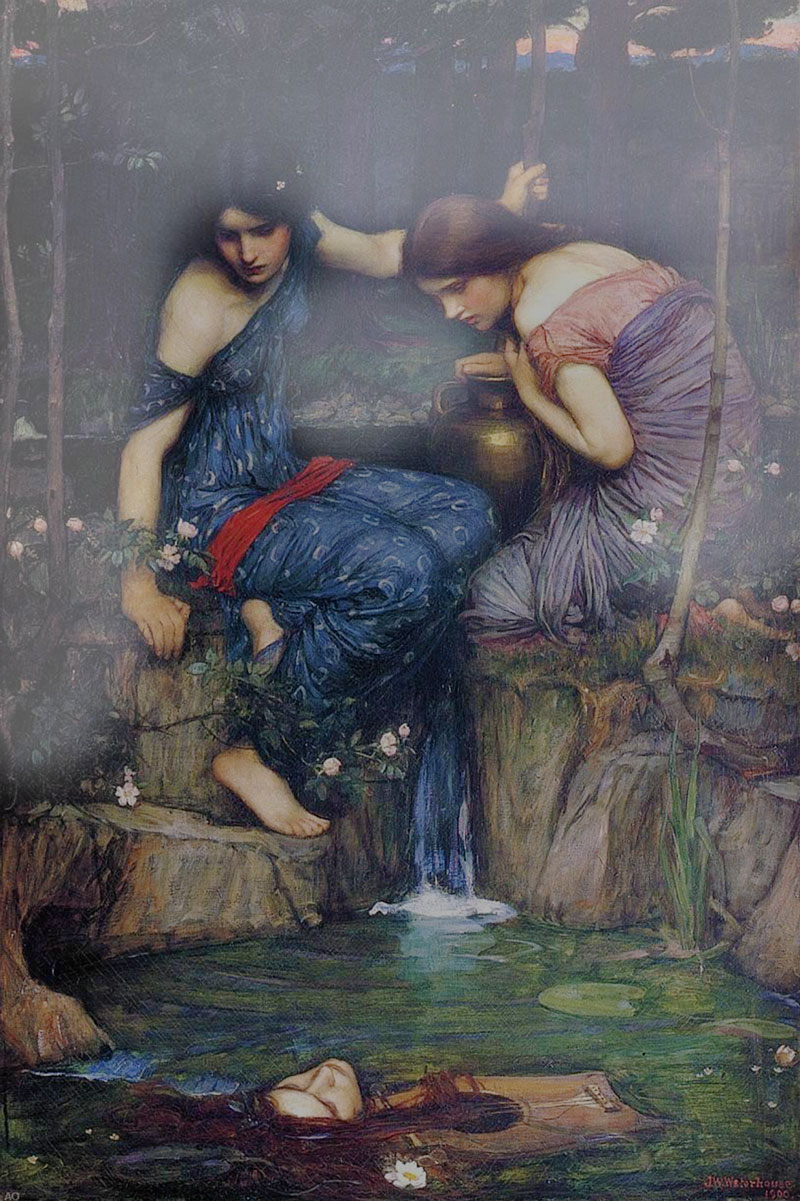
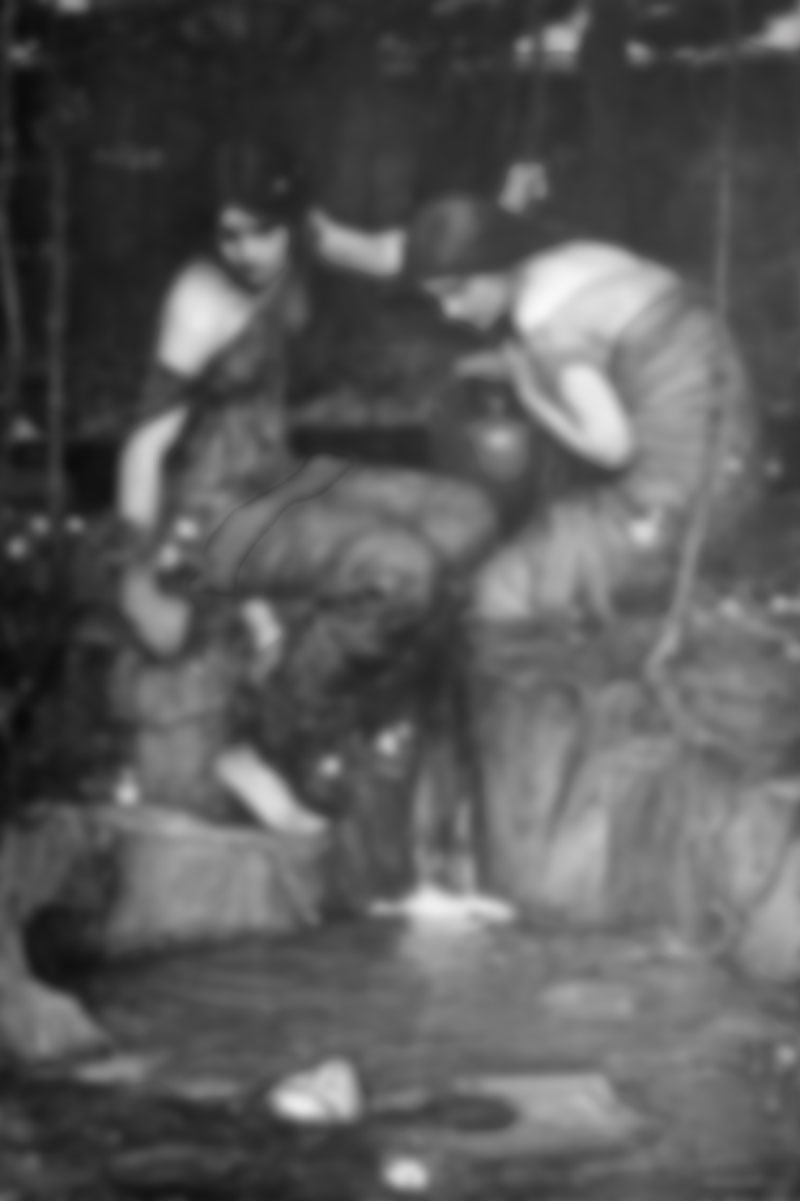
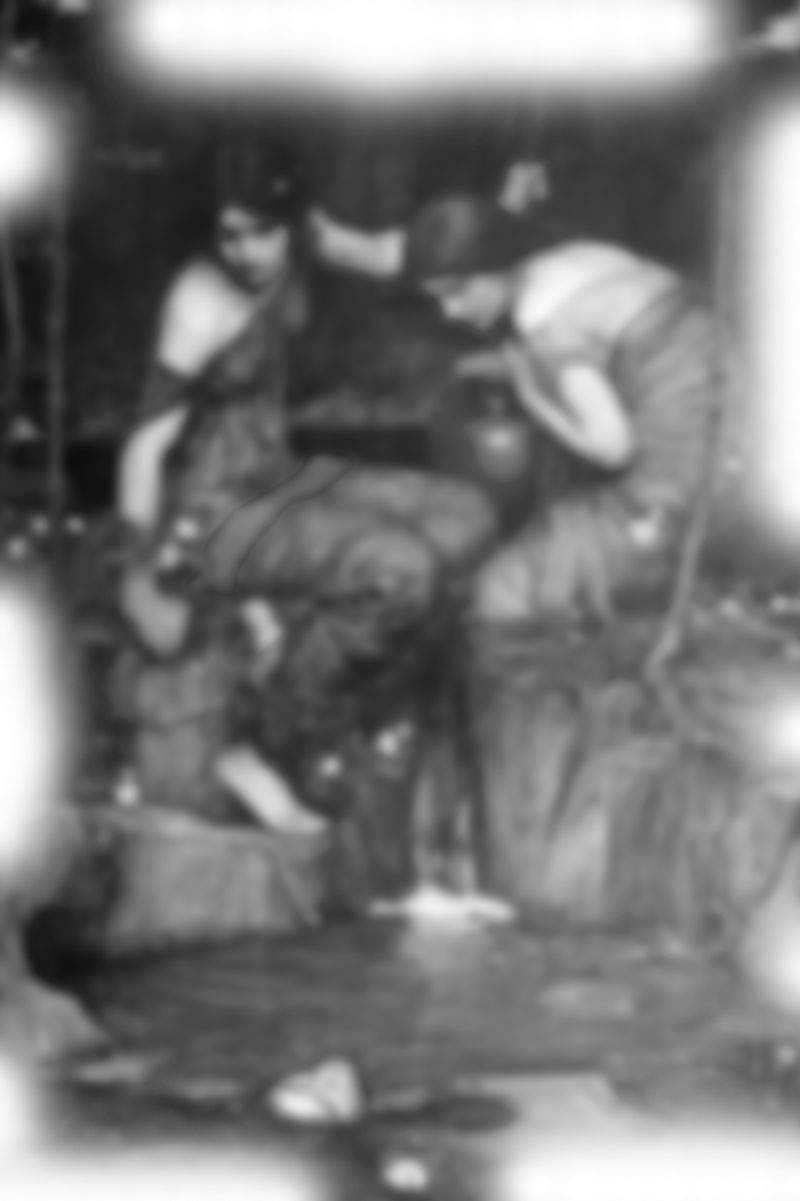
Now let’s look closely at the value scheme of the painting. This will show us where the contrast is and allow us to control areas that distract from the subject. Can you identify the GAC? Do you see any Edge Flicker? Let’s see if you’re right!
Greatest Area of Contrast (GAC)
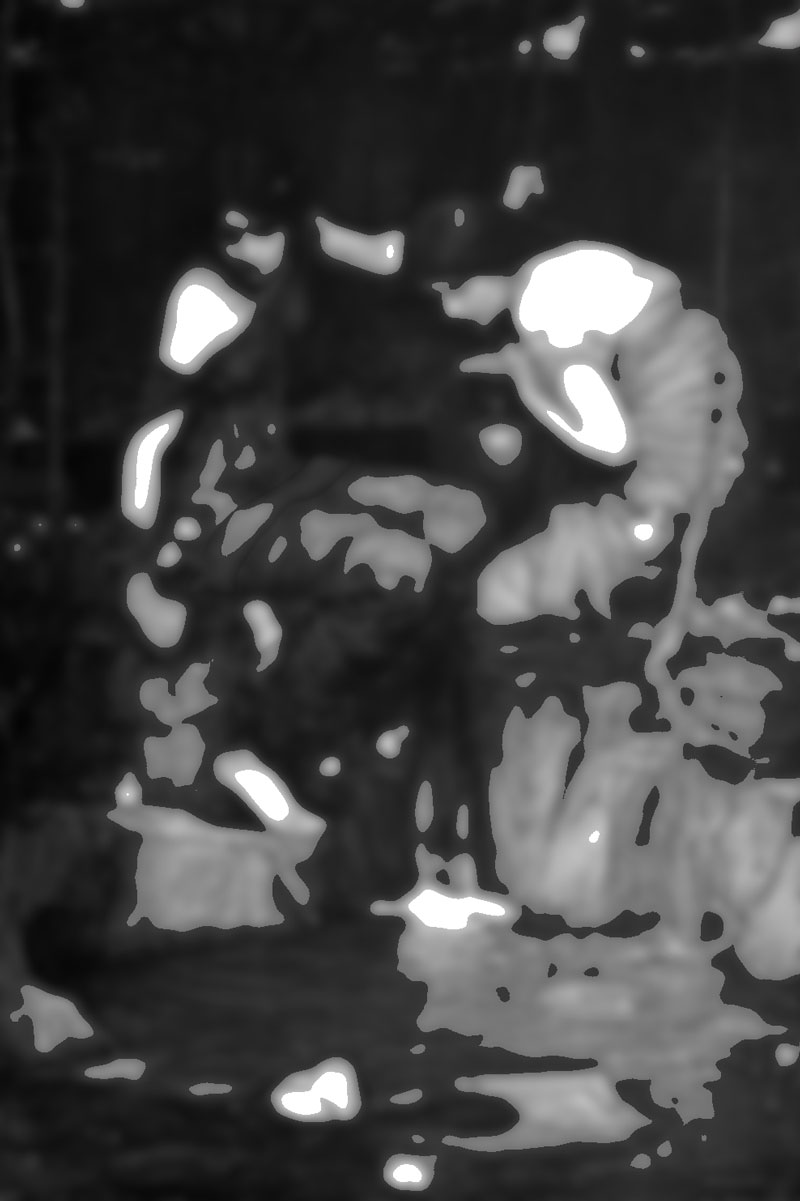
When we do some Photoshop magic, we’re able to easily see the greatest area of contrast (see Day 27), as well as any distractions. It seems to be the girl on the right, then the left, then Orpheus.
Edge Flicker
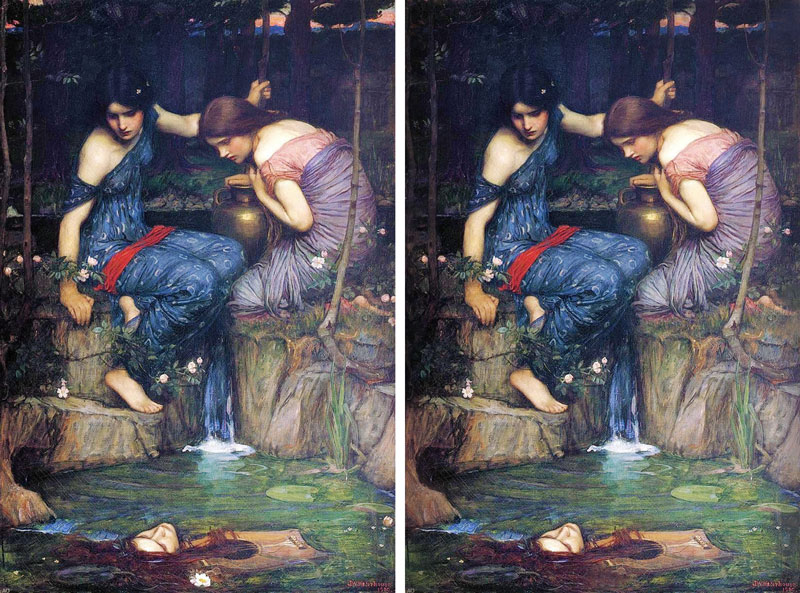
Waterhouse has got some areas of edge flicker (see Day 49), which could be improved. Edge flicker should be avoided unless it’s redirecting our attention back into the composition. At least it’s equally distributed fro left to right and not creating an imbalance from the vertical centerline. It still creates distractions from the main subjects though.
 Edited Version
In this edit (see right), we can see an area of contrast in the distance (exit or window) for the eyes to travel to. This still helps create a window of depth (see Day 249), but the other high contrast areas around the frame aren’t needed to create the same effect. Can you feel the difference? Even the bright white flower by the head of Orpheus was drawing attention away from him.
Conclusion
Well, are you impressed by John William Waterhouse and the techniques he used to create his masterpiece? Remember, you are following in the footsteps of the masters too! Just by studying composition and design techniques, you’re tapping into their exact same skillset. Keep at it, apply all you can, and maybe people will be analyzing YOUR work in the future.
Thanks so much for joining in and thanks a ton for being a member. You are appreciated! See you next time!